How To Change Wheel Bearings

1. Introduction to Wheel Bearings

Wheel bearings are an essential part of your vehicle’s suspension system. They are responsible for allowing the wheel to rotate freely, which helps keep your car running smoothly and safely. Over time, wheel bearings can become worn out or damaged, leading to poor performance and increased wear on other parts of the suspension system. That is why it is important to replace them regularly. In this guide, we will show you how to change your wheel bearings quickly and easily.

2. Tools and Materials Needed for Changing Wheel Bearings

Before you start changing your wheel bearings, it is important to make sure you have all the necessary tools and materials on hand. These include a bearing puller, a torque wrench, a bearing press, grease, and new wheel bearings. You should also have safety glasses and gloves available in case of any mishaps during the process.

3. Removing the Old Wheel Bearing

Once you have all the necessary tools and materials ready, it’s time to remove the old wheel bearing from the hub assembly. Start by loosening the lug nuts on the wheel before jacking up the car so that you can access the hub assembly from underneath it. Then use a bearing puller to remove the old bearing from its housing in the hub assembly. Be sure to keep track of any shims or spacers that may come out with it as these will need to be replaced when installing your new wheel bearing.

4. Cleaning the Hub Assembly

Once you have removed the old bearing from its housing in the hub assembly, it is important to clean out any dirt or debris that may be present in order to ensure a proper fit for your new bearing when installed later on in this process. Use some brake cleaner or degreaser along with a rag or brush to thoroughly clean out any dirt or debris inside of your hub assembly before moving onto installing your new bearing later on in this guide.

5. Installing the New Wheel Bearing

Now that you have cleaned out your hub assembly, it is time for installing your new wheel bearing into place! First off make sure that all components such as shims or spacers are present before pressing in your new bearing into place using a bearing press tool (or an impact driver if one is not available). It is important that this step is done correctly as improper installation can lead to premature wear down of both components as well as an unsafe driving experience overall!

6 Securing The Bearing In Place

Once you have pressed your new wheel bearing into place inside of its housing in the hub assembly, it is now time for securing it into place properly! This can be done by using either lock nuts or cotter pins depending on what type of fastener was used previously when removing your old wheel bearing earlier on in this guide! Make sure that these fasteners are tightened down properly using either hand tools or an impact driver before moving onto testing and adjusting later on!

7 Testing And Adjustment Of New Wheel Bearing

After securing down all fasteners associated with your newly installed wheel bearings properly into place; it is now time for testing and adjustment! Start off by checking if there are any noises coming from around where you just installed them by spinning each respective tire while keeping an ear out for any strange noises coming from around those areas! If everything sounds good then move onto adjusting their pre-load settings (if applicable) by following manufacturer instructions until desired performance levels are achieved!

8 Conclusion

Changing wheel bearings may seem like a daunting task at first but with some basic knowledge about how they work along with some special tools; anyone can do it quickly and easily! We hope that this guide has been helpful in teaching you how to change yours safely so that they last longer while providing optimal performance levels throughout their lifespan!

9 Frequently Asked Questions (FAQs)

Q: How often should I replace my wheel bearings?
A: Generally speaking most manufactures recommend replacing them every 50K miles however; different vehicles may require different intervals so always refer back to manufacturer instructions when performing maintenance work such as this one!

A Step-by-Step Guide to Easily Changing Your Wheel Bearings!

Can I replace a wheel bearing myself?

Replacing your wheel bearings is considered an intermediate task that can be done at home but requires some special machine tools.

Is it hard to change a wheel bearing?

There are many moving parts between the wheel bearings and they are not easy to replace. It is best to take it to a mechanic unless you have a lot of training and experience.

How much does it usually cost to replace a wheel bearing?

Some variables include wages and parts costs from manufacturers and model garages. The national average for securing wheel bearings to a wheel is about $100.

How long does it take to change a wheel bearing by yourself?

This makes it difficult to give an overall time estimate but expect anywhere from 30 minutes to an hour and a half for the front and back nails.

How do I tell which wheel bearing is bad?

This can be checked by stopping the car while driving slowly. If the noise decreases when swinging to the right the damaged bearing may be on the left wheel bearing. If it falls while swinging to the left the right wheel bearing may break.

Can you drive a car with a wheel bearing out?

Question. Is it safe to drive with a damaged tire? Answer: Not really driving can be very dangerous if you have a worn bearing especially since it can lock the steering while driving. In addition a bad wheel bearing puts pressure on the constant speed connection of the hub and the gearbox itself.
How To Connect Your Ipod To A Car Stereo

1. Introduction

Connecting your iPod to a car stereo is a great way to enjoy your favorite music while you’re on the go. It’s also an easy way to keep your music library up-to-date without having to waste time and energy transferring files from one device to another. In this article, we will discuss the steps needed for connecting an iPod to a car stereo, as well as the benefits of doing so and some troubleshooting tips in case things don’t go as planned.

2. What You Need to Connect Your Ipod to a Car Stereo

The first step in connecting your iPod to a car stereo is gathering the necessary items. Most modern car stereos are equipped with auxiliary ports that allow you to plug in any type of audio device, including iPods. However, if your car stereo does not have an auxiliary port, then you will need an adapter that allows you to connect via Bluetooth technology or through a headphone jack. Additionally, you may need an additional cable if the one provided with your iPod is not long enough or compatible with your car stereo.

3. Steps for Connecting an Ipod to a Car Stereo

Once you have gathered all of the necessary items, it’s time to start connecting them together! The first step is plugging in the auxiliary cable or adapter into both the iPod and the car stereo. Make sure that both devices are turned off before doing this in order to avoid any potential damage or malfunctions. After everything is connected properly, turn on both devices and select ‘auxiliary’ as your audio source on the car stereo. This should be followed by selecting ‘play’ on your iPod and adjusting the volume accordingly on both devices until you can hear sound coming out of your speakers!

4. Using Auxiliary Cables or Bluetooth Technology for Connecting an Ipod to a Car Stereo

If you don’t have access to an auxiliary port on your car stereo, then there are two other options available for connecting your iPod: using Bluetooth technology or through a headphone jack. For either option, make sure that both devices are turned off before beginning and follow all instructions provided by the manufacturer of each product carefully!

For Bluetooth connections:
1) Turn on Bluetooth on both devices
2) Locate each device within range of one another
3) Follow prompts from each device until they are successfully paired together

For headphone jack connections:
1) Plug one end of the cable into the headphone jack of both devices
2) Turn on both devices
3) Select ‘play’ on your iPod and adjust volume accordingly until sound comes out of speakers

5. Troubleshooting Tips for Connecting an Ipod to a Car Stereo

If you find that sound isn’t coming out of your speakers after following all steps correctly then there may be something wrong with either device’s settings or connection type (Bluetooth vs headphone jack). To troubleshoot this issue try turning off both devices completely and then turning them back on again while making sure they remain within range of one another if using Bluetooth technology or that cables remain plugged in correctly if using headphones jacks instead! Additionally, make sure that ‘auxiliary’ is selected as audio source from within settings menu on car stereo and ‘play’ is selected from within settings menu on iPod itself before attempting any other troubleshooting steps!

6. Benefits of Connecting an Ipod to a Car Stereo

Connecting an iPod directly into a car stereo has many benefits over traditional methods such as CD players or radio stations for playing music in vehicles; these include but are not limited too:

• Increased convenience – no more switching between CDs/radio stations when trying listen different songs/genres; just use playlists!
• Increased storage capacity – no more worrying about running out room due limited amount discs/stations available; store thousands songs without taking up much space!
• Improved sound quality – since there no physical medium involved (like CDs), digital audio files can be played at higher bitrates than analog formats which results better overall sound quality!

7. Conclusion

Connecting an iPod directly into a car stereo can be done easily with just few simple steps outlined above; it also offers many advantages over traditional methods such as increased convenience storage capacity improved sound quality etc.. Hopefully this article has given clear insight into how connect iPods cars stereos so now get listening those favorite tunes road trips anytime soon!

8. Resources and Further Reading

• https://www.lifewire.com/connect-ipod-to-car-stereo-1999273  – A comprehensive guide for connecting any type of audio device (including iPods) into cars stereos via aux cables/Bluetooth technology etc..     • https://www9to5maccom/guides/how-to-connect-your-iphone-or-ipod-touch-to-your -car – An informative guide specifically tailored towards iPhones & iPods detailing different ways connect them cars stereos including aux cables/Bluetooth etc..     • https://supportapplecom/en_us/HT204477 – Apple’s official support page providing detailed instructions how connect iPhones & iPods cars stereos using various methods such aux cables/Bluetooth etc..     • http://wwwthewirecuttercom/reviews/best -aux -cable / – A comprehensive review best auxiliary cables market currently enabling users connect their audio devices cars stereos easily & reliably without breaking bank!

9 FAQs about Connecting an Ipod To A Car Stereo

 Q: Is it possible connect my iPod directly into my car’s factory installed radio?
 A: Yes it is possible depending upon what type radio installed factory however most newer models do come with auxiliary ports allowing users plug their iPods directly into those ports instead having use third party adapters such bluetooth etc..

Unlock the Power of Your Ipod: Learn How to Easily Connect It to Your Car Stereo!

How do I pair my iPod to my car?

Go to Settings > Bluetooth and turn off Bluetooth. Wait about 5 seconds then turn on Bluetooth. Refer to the manual that came with your car for more information on how to pair with a Bluetooth device. Most cars require phone settings on the car screen.

How do I connect my iPod to my car stereo via USB?

Use a USB charging cord (or Lightning cable for newer iPhones) to connect your smartphone to your cars factory USB port. In most cases this method will allow the information in your device to appear on your cars factory radio display. You can charge your device directly through the USB input.

Can I play my iPod through my stereo?

Connect the iPod to the iPod headphone jack with a stereo cable (or an iPod dock if you have one) and then connect the RCA audio jack to your stereo receiver.

Why doesn’t my iPod work in my car?

If youve ruled out the cable in the car and the iPod as the cause its possible that the iPod dock connector and USB cable (in the car) are damaged preventing them from connecting in the meantime. iPod. The tap still works (because the base connector wears less).

Does an iPod work in a car?

The car aux jack allows iPods and all other mobile devices to connect to your car stereo via the headphone jack (analog output). But the best types of adapters make an iPod (or iPhone or iPad) part of a car entertainment system by plugging the device directly into a 30-pin or Lightning port.

Can you use an iPod in a car?

USB Aux Bluetooth Direct Control (Easy Option) The easiest way to listen to your iPod iPhone or iPad in the car is to use a USB input or auxiliary Bluetooth connection or iPod Direct Control.

How To Check And Add Radiator Fluid

1. Introduction

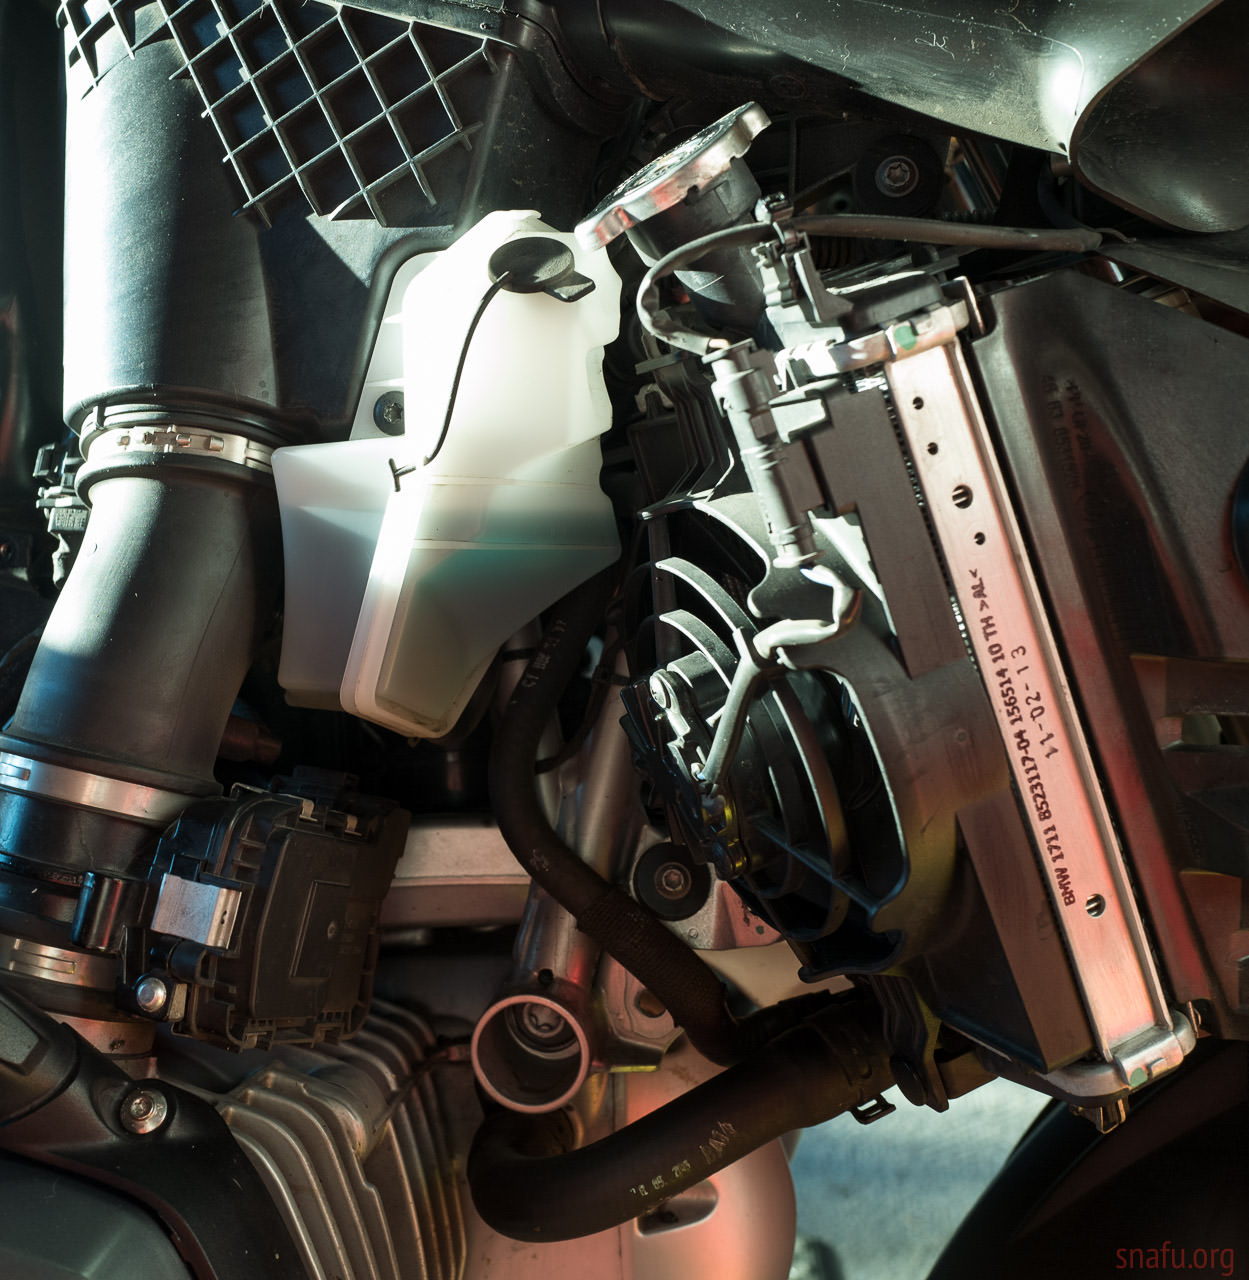
The radiator is a vital component of any vehicle’s cooling system and it is important to check and add radiator fluid regularly to ensure that the system is running smoothly. Radiator fluid, also known as coolant, helps keep the engine temperature regulated and prevents it from overheating. In this article, we will discuss how to check and add radiator fluid in order to keep your vehicle running properly.

2. Necessary Tools and Supplies

Before you begin, you will need the following tools and supplies:
• Radiator cap
• Coolant/radiator fluid
• Funnel
• Container for catching coolant (optional)
• Rags (optional)

3. Checking the Radiator Fluid Level

The first step in checking and adding radiator fluid is to check the level of the existing coolant in the radiator. To do this, remove the radiator cap and look inside at the coolant level. The coolant should be at least halfway up the side of the radiator or slightly higher; if it is lower than that, then you should add more fluid. If there is no visible coolant in your radiator, then it needs to be filled up completely with new fluid.

4. Adding Radiator Fluid to the System

Once you have determined that your vehicle needs additional coolant/radiator fluid, you can begin adding it to the system. Start by pouring some of your new coolant into a funnel placed inside a container or directly into your radiator tank if there is no container available. Make sure not to overfill; leave a few inches of space between the top of your container or funnel and where your new coolant will be added so that air can escape when you replace the cap on your tank later on.

5. Other Considerations When Adding Radiator Fluid

When adding new radiator fluid/coolant, make sure that it meets all manufacturer specifications for compatibility with other components in your vehicle’s cooling system such as hoses or seals. Additionally, some vehicles require special types of antifreeze for winter use; make sure that you are using an appropriate type for your climate if necessary before adding any new fluids to your system.

6. Common Mistakes to Avoid when Checking and Adding Radiator Fluid

When checking and adding radiator fluid/coolant, one common mistake people make is not allowing enough time for air bubbles in their system to escape before replacing their cap after filling up their tank with new fluids; this can cause pressure buildup which can damage components in their cooling system over time if left unchecked so make sure that all air has escaped before replacing any caps on tanks or other components in your vehicle’s cooling system after topping off fluids levels or making repairs/replacements elsewhere in the system such as hoses or seals etc..

Another common mistake people make when checking and adding radiator fluid/coolants is not using an appropriate type for their climate; many vehicles require special types of antifreeze during winter months so make sure that you are using an appropriate type before filling up any tanks with new fluids if necessary!

Finally, some people may forget to check their old fluids levels before topping off their tanks with new ones; always remember to check existing levels first so that you don’t end up overfilling!

7 Signs of a Bad Radiator or Coolant Leak

If you notice any signs of a bad radiator or coolant leak such as puddles underneath your car after parking it overnight then this could indicate an issue with either component which would need immediate attention from a qualified mechanic! Some other signs include:  an increase in engine temperature while driving; steam coming from under hood; strange odors coming from under hood (could indicate burning antifreeze); low levels of antifreeze in reservoir tank etc…  

8 Conclusion

In conclusion, checking and adding radiator fluid/coolants is an important part of maintaining a healthy vehicle cooling system as well as preventing costly repairs down the road due to overheating issues caused by low levels of fluids or leaks within components such as hoses etc… Always remember to use compatible types for different climates if necessary and always allow plenty of time for air bubbles within systems to escape before replacing caps! Additionally, watch out for signs indicating potential issues with radiators or leaks which could become costly repairs down the line!  


                                                                                                                                                                                                                                                                                                                                                                                                                      9 Resources

https://www.yourmechanic.com/article/how-to-check-and-add-radiator-fluid-by-richard-m.-brooks#:~:text=The%20radiator%20is%20a%20vital%20component%20of%20any%20vehicle’s%20cooling&text=Make%20sure%20not%20to%20overfill;leavea few inchesof space betweenthe topofyour containeror funnelandwhereyournewcoolanthttps://www.autoblog.com/2014/06/02/how-to-check-add-fluid-to-your-cars-radiators/#:~:text=Checkingtheleveloftheexistingcoolantisstepone.,itneedstobefilledupcompletelywithnewfluidhttps://www1bptechsolutionsincorporatedcomau/-HowToCheckAndAddRadiatorFluid#:~:text=Whenaddingnewradiatorfluidcoolantamake&text=Finallysomepeoplemayforgettochecktheiroldfluidslevelsbeforetoppingofftheirtankswithnewones

A Step-by-Step Guide to Ensuring Your Vehicle’s Radiator Fluid is Up to Par

Can I just add radiator fluid?

If the coolant level in the reservoir is low you can fill it up to the maximum fill line but do not overfill. The coolant mixture expands when heated requiring additional space. Keeping the coolant at the right level is one way to keep your radiator in good condition.

How do I know if I need to add radiator fluid?

Checking the Fluid Level It is a good idea to check the level in the morning before starting your vehicle. This allows time to cool overnight. Open the hood and look at the fluid reservoir. Antifreeze is low if it is below the fill line.

How do I check and add antifreeze to my radiator?

0:091:19 Follow the hose coming from the top of the radiator cap this will take you to the coolant Again follow the hose coming from the top of the radiator cap this will take you to the coolant tank this is usually But there is a clear plastic tank. . Indicator full and low outside.

How do I know if my radiator fluid is low?

A good way to tell if your coolant is low or if you are running with low coolant is to check your cars gauge or temperature gauge and make sure the car is warm. The car should have an indicator or warning light somewhere on the dash to detect this.

Is it OK to put water in my radiator instead of coolant?

Only use the radiator in an emergency if the water in the radiator is low or completely empty and you need to add fluid to the car. Ideally add a 50/50 mixture of coolant and water (or pre-mixed coolant) as you continue to drive and you can add water to the radiator to get where you want to go.

Is radiator fluid the same as coolant?

Now antifreeze and coolant are essentially the same thing and are commonly referred to as radiator fluid. And this fluid helps your vehicles engine run smoothly and prevent freezing or overheating in any weather.

How To Engine Block Sealer To Repair A Head Gasket Leak

1. Introduction

Head gaskets are an integral part of any vehicle’s engine and are responsible for sealing the combustion chamber, allowing for efficient compression and preventing oil and coolant from mixing. Unfortunately, head gaskets can fail due to a variety of reasons, resulting in a head gasket leak. A head gasket leak can be very dangerous if left unchecked, as it can cause major damage to the engine. In this article, we will discuss what a head gasket leak is, its causes, symptoms, how to diagnose it and how to repair it using an engine block sealer.

2. What is a Head Gasket Leak?

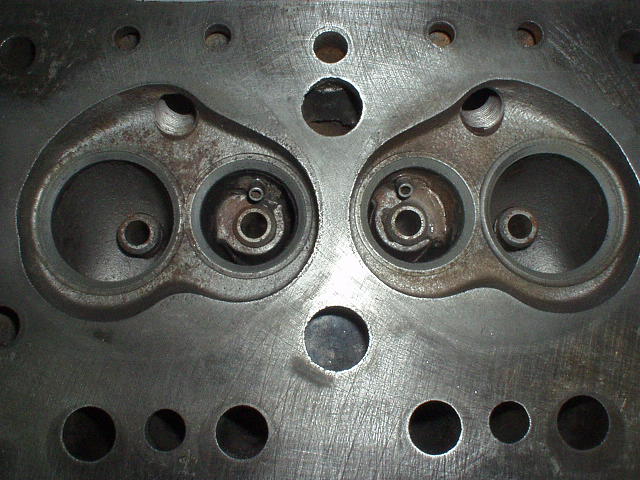
A head gasket leak is when the seal between the cylinder head and the engine block has failed. This failure allows coolant or oil to escape from the combustion chamber, causing a decrease in compression or an increase in exhaust pressure. Head gasket leaks can be caused by many things such as overheating, corrosion, or poor installation of the head gasket itself.

3. Causes of a Head Gasket Leak

There are many potential causes of a head gasket leak including:
• Overheating – If your vehicle’s engine gets too hot then this can cause the metal parts to expand at different rates which can result in a weakened or broken seal between the cylinder head and engine block.
• Corrosion – If there is corrosion on any of the metal parts then this can weaken or break the seal between them which will result in a head gasket leak.
• Poor Installation – If the head gasket was not installed correctly then this could also lead to a weakened or broken seal which will result in a head gasket leak.

4. Symptoms of a Head Gasket Leak

If your vehicle has developed a head gasket leak then there are several symptoms that you should look out for:
• White smoke coming from your exhaust – This is usually caused by water vapor escaping through the exhaust pipe due to coolant leaking into it from the combustion chamber.
• Overheating – If your vehicle is running hotter than usual then this could be caused by coolant leaking out of your engine due to a faulty head gasket seal.
• Low Coolant Levels – A leaking head gasket will cause your vehicle’s coolant levels to drop quicker than normal as it escapes through the faulty seal into other parts of your engine such as your exhaust system or radiator hose(s).

5. How to Diagnose a Head Gasket Leak?

If you believe that you may have developed a head gasket leak then there are several tests that you can do in order to confirm this:
• Pressure Test – This involves testing for pressure within your cooling system using specialised equipment such as pressure gauges or vacuum pumps which measure for pressure drops within certain areas of your cooling system which could indicate that there is an issue with one or more seals within it (such as with your cylinder heads).
• Compression Test – This involves measuring how much air pressure is able to escape from each cylinder within your engine during operation which can help identify any issues with seals such as those found on cylinder heads (as well as other components).

6 How To Repair A Head Gasket Leak?

Head Gaskets are typically replaced when they fail but sometimes they may be able to be repaired depending on their condition and location within the engine block/cylinder heads etc… One way that they may be able to be repaired without needing replacement is by using an Engine Block Sealer; these products contain chemical compounds which form temporary seals over small holes/cracks etc… thus allowing for temporary repairs until permanent repairs/replacement can be done later down the line if necessary (or desired).

7 Engine Block Sealer: The Best Solution For Repairing A Head Gasket Leak

Engine Block Sealers are designed specifically for repairing small leaks/holes within engines without needing full replacements; these products contain chemical compounds which form temporary seals over small holes/cracks etc… thus allowing for temporary repairs until permanent repairs/replacement can be done later down the line if necessary (or desired). These products work best when used on small leaks where full replacement would otherwise not only be costly but also time consuming; they also provide an effective solution when dealing with hard-to-reach areas where full replacement would otherwise not be possible due their location etc…

8 How To Use An Engine Block Sealer To Repair A Head Gasket Leak?

Using an Engine Block Sealer is relatively simple but should always be done with care; here are some steps you should take when attempting such repairs:
• Ensure That Your Vehicle Is Off & Cooled Down – Before attempting any repairs make sure that your vehicle has been turned off and allowed time enough time too cool down before attempting any repairs so as not too cause yourself harm while doing so! • Locate The Source Of The Leak – Using specialized equipment such as pressure gauges & vacuum pumps locate where exactly on your vehicles cooling system (such as near cylinder heads) that there appears too be leakage occurring so that you know exactly where too apply sealer! • Apply The Sealer – Once located apply sealer directly onto effected area following instructions provided by manufacturer & allow time specified before attempting further operations! • Check For Further Issues – After allowing specified time check again using same equipment used earlier too ensure no other problems have arisen & if all looks good turn on vehicle & check again after running for specified amount of time!

9 Conclusion

>In conclusion we have discussed what exactly constitutes a ‘headgaskt leak’,its causes,symptoms,how too diagnose it & finally how too repair it using an ‘engine block sealer’.It’s important too note however that although these products provide great solutions when dealing with hard-to-reach areas where full replacement would otherwise not be possible due their location etc..they should only ever been used by those who know what they’re doing & who understand fully all safety precautions required when dealing with combustible materials.

Revealed: A Simple Solution to Fix Head Gasket Leaks with Engine Block Sealer!

How do you fix a head gasket with engine block sealer?

How to apply head gasket sealant? Carefully pour the head gasket sealant into the radiator. Drive it for about 15-20 minutes to make sure its circulating throughout your car and check again for leaks after a few hours.

Will Block seal fix a blown head gasket?

This job has been viewed 515548 times. Head chip leakage can be a big problem. If you dont want to send your car in for a proper head gasket replacement you can try an engine block seal to repair it yourself.

Does block sealer really work?

The answer to this question is yes radiator sealant works. However they are only good for temporary fixes not a magic solution. Even so-called permanent sealants only last for months not years.

How long does engine block sealer last?

Most signatories offer a lifetime free of charge but it can last up to six months if the damage is severe.

Will Bluedevil radiator and block sealer work on the head gasket?

describe. Blue Devils Engine and Cooling Sealant has an incredible ability to seal and seal leaking radiator caps and cracked or warped heater heads as well as most melted head gaskets creating a permanent seal.

Will head gasket sealer hurt my engine?

Is the head gasket seal safe with my equipment? No the particles used in K-Seal are so small that they can only seal holes up to 0.635 mm in diameter and it has no effect on penetrating under the heater core or radiator fins. .

How To Be A Professional Race Car Driver

1. Introduction

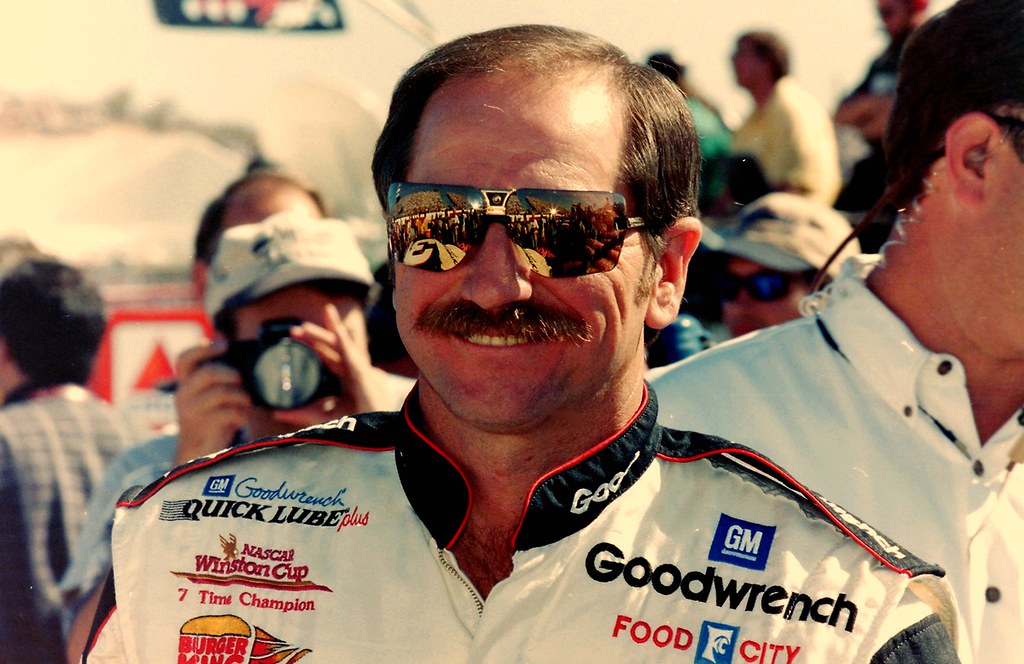
The dream of becoming a professional race car driver is one that many people share, but few ever get to realize it due to the immense amount of hard work and dedication required to make it happen. Becoming a successful race car driver involves more than just driving fast; it requires discipline, training, and focus. It also requires an understanding of the racing industry, as well as the ability to manage both your time and finances. The following guide will provide you with a comprehensive overview of what it takes to become a professional race car driver.

2. Developing your Skills

The first step in becoming a professional race car driver is developing your skills behind the wheel. This means spending time on track, learning how different cars handle in various conditions, and honing your skills as a driver. It’s important to practice regularly in order to stay sharp and be able to react quickly when necessary. Additionally, you should take every opportunity available to learn from more experienced drivers who have been in similar situations before.

3. Getting the Right Training

In addition to developing your own skill set, you should also consider investing in some formal training courses or programs that can help you further hone your skills as a racer. There are many organizations that offer courses specifically designed for aspiring racers, including those focused on racecar engineering and mechanics, safety protocols, and even marketing yourself as a professional racer. These courses can provide invaluable knowledge that will help you succeed in the sport of racing.

4. Finding a Sponsor

Having financial backing is essential for any professional racer looking to make it big in the sport of racing; this is why finding a sponsor is so important for aspiring racers who want to make it big in the world of motorsports. When looking for sponsorships, look for companies whose values align with yours; this will ensure that you have an ally who can provide support when needed and help promote your career as well as theirs. Additionally, having multiple sponsorships can help diversify your income stream so that you don’t have all your eggs in one basket financially speaking.

5. Participating in Races

Once you’ve developed your skills behind the wheel and secured sponsorship money from one or more companies, it’s time to start participating in races on a regular basis if you’re serious about becoming a professional race car driver. Participating in races not only gives you valuable experience on track but also allows potential sponsors or teams to see how well you drive under pressure; this can be key when trying to secure long-term deals or contracts with teams or sponsorships with companies down the line..

6 Building Your Reputation

As important as having good results on track is building up an impressive reputation off track by being professional at all times and making sure that everyone around you knows who you are and what kind of racer you are striving towards becoming.Make sure that when people think of racers they think of YOU! You can do this by networking with other drivers or teams,attending events such as autograph signings,participating in interviews,etc.Being active within the racing community can go along way towards establishing yourself as someone worth investing into.

7 Entering Professional Races

Once all these steps have been taken,it’s time for aspiring racers to start entering into professional races.While there may be some amateur level races available,these will not offer nearly enough experience or exposure needed for aspiring racers looking to make it big.Professional series such as NASCAR,Formula One,IndyCar,etc.offer much higher stakes competition which can give racers invaluable experience while also providing them with exposure amongst potential sponsors or teams.

8 Staying Ahead of Competition

Finally,staying ahead of competition is essential for any racer looking to make it big.This means studying up on new technologies being used by other teams or drivers,researching different tracks before each event,staying active within social media circles related to racing ( Twitter / Facebook / Instagram ) & always pushing yourself further than where others may stop.Being one step ahead could mean the difference between success & failure out on track & should never be underestimated!

9 Conclusion

Becoming a professional race car driver requires dedication & hard work but if done right could lead up towards great success!Developing ones skill set behind the wheel & getting proper training are key steps while finding sponsorships & participating regularly in races are equally important aspects which must not be overlooked!Lastly staying ahead of competition through research & staying active within social media circles related towards racing will prove invaluable once out on track!

Unlock Your Inner Speed Demon: The Essential Guide to Becoming a Professional Race Car Driver

How much do professional Race Car Drivers make?

ZipRecruiter reports salaries as low as $87500 to as low as $16000 but most salaries in the racing driver job category currently range from $21000 (25th percentile) to $50000 (75th percentile) with a top salary of $74 (90th percentile). yearly across the United States.

Is it hard to be a professional race car driver?

Being a successful racing driver requires more than skill. It also takes a lot of hard work and determination. It costs money! If you want to get into motorsport this is the most expensive route you can take.

Do Race Car Drivers make good money?

Race car driver salaries in the US range from $19910 to $187200 with an average salary of $44680.

Can I make a living racing cars?

You can make a living as a race car driver. But it takes more than getting behind the wheel. Success in this competitive industry requires dedicated skills and the right attitude. If you have what it takes a race car driver job is definitely available.

Can you become a racing driver with no money?

Can you become a racing driver with no money? Not easy but not impossible at the same time. If you want to move up the ranks you need sponsors.

How much do NASCAR drivers make?

NASCAR driver salaries in the US range from $21364 to $577997 with an average salary of $103858. The middle 57 percent of NASCAR drivers earn between $103862 and $260376 and the top 86 percent earn $577997.

How To Calculate The Value Of A Salvaged Car

1. Introduction

Calculating the value of a salvaged car can be a tricky process. It’s important to understand the difference between a salvage and rebuilt title, research the vehicle’s history, inspect it in person, consider the cost of repairs, calculate the value of parts on the vehicle, compare prices with similar vehicles, and negotiate a fair price for both parties. This article will provide step-by-step instructions on how to accurately calculate the value of a salvaged car.

2. Understand the Difference between Salvage and Rebuilt Titles

The first step in calculating the value of a salvaged car is understanding the difference between a salvage and rebuilt title. A salvage title indicates that an insurance company declared the vehicle to be a total loss due to damage or other issues. A rebuilt title means that the vehicle was repaired and inspected by an authorized agency before being put back on the road.

3. Research the Vehicle’s History

Once you have determined whether or not the vehicle has a salvage or rebuilt title, it’s important to research its history thoroughly. You should check for any reported accidents, flood damage, odometer issues, recalls or any other information that may affect its worth. This can be done through online resources such as Carfax or AutoCheck.

4. Inspect the Vehicle in Person

It’s also important to inspect the vehicle in person before making any decisions about its worth. Look for any signs of damage or wear and tear that may not have been reported in its history report. Take note of any mechanical issues that need to be addressed as well as any cosmetic problems that need repairing before you make an offer on it.

5. Consider the Cost of Repairs

When calculating how much you should offer for a salvaged car, you should also consider how much it would cost to repair it completely before putting it back on the road again legally with a rebuilt title. This includes both mechanical repairs as well as cosmetic ones such as paint jobs or body work repairs if necessary. Make sure you factor this into your offer price when negotiating with sellers so that you don’t end up paying more than necessary for repairs after purchase if something unforeseen pops up later down the line!

6. Calculate The Value Of Parts On The Vehicle

In addition to considering repair costs when calculating how much you should offer for a salvaged car, you should also factor in how much money each individual part would cost if purchased separately from another source such as an auto parts store or junkyard instead of buying them all together from one seller at once (which often comes with discounts). This will help ensure that your offer price is fair given what each part is actually worth individually instead of overpaying due to bundle deals offered by sellers who are trying to make more money off their sales!

7 Compare Prices With Similar Vehicles

It’s also important to compare prices with similar vehicles when calculating how much you should offer for a salvaged car so that you don’t overpay for something that isn’t worth what they are asking for it! Look at other models from different years and trim levels within your budget range so that you can get an idea of what is considered fair market value based on condition and mileage rather than just relying on what one seller tells you their asking price is!

8 Negotiate A Fair Price For Both Parties

Once you have done your research and calculated how much money each part would cost if purchased separately as well as compared prices with similar vehicles within your budget range, it’s time to negotiate a fair price with sellers who are selling their salvaged cars! Remember: always keep an open mind during negotiations so that both parties can come away satisfied at having reached an agreement they’re both happy with!

9 Conclusion

.
In conclusion, calculating how much money one should offer when buying a salvaged car requires research into its history report, inspection in person, consideration of repair costs, calculation of individual parts’ values and comparison with similar vehicles within budget range before finally negotiating with sellers for an agreeable deal! By following these steps carefully anyone can accurately calculate what constitutes fair market value when purchasing these types of cars – ensuring they don’t overpay while still getting exactly what they need out of their purchase!

Discovering The True Worth Of A Salvaged Car: Uncovering The Secrets Of Calculating Its Value

How is car salvage price calculated?

You must obtain the retail price (private party sales amount) and the vehicle dealers price for the trade-in. Add these two amounts and divide the total in half to determine ACV.

How much value does a car lose with a salvage title?

According to Kelley Blue Book (KBB), a salvage-title car is typically worth 20 percent to 40 percent less than one with a clean title. If you make a claim on a salvage car, you should be prepared for a much lower total loss payoutthan you might expect from a car thats clean.

What is the value of a salvage?

Residual value is the book value of an asset after all depreciation charges have been taken out. The residual value of the asset is based on the amount that the company expects to receive in return for selling or disposing of the asset at the end of its useful life.

What’s my car worth with a rebuilt title?

How does a rebuilt title affect a cars value? A vehicle with a rebuilt title is likely to have a lower market value because of significant damage. A car with a rebuilt title can cost 20-40% less than similar models with a clean title that can potentially fetch thousands of dollars.

How do you find the actual cash value of a car?

ACV is determined by the replacement cost of your car minus depreciation taking into account factors such as age and wear and tear. Most insurance policies will cover the actual cash value of your car at the time of a claim and use a third party to determine your cars ACV value.

What is the downside of a salvage title?

Disadvantages Mentioned repairs can be expensive: The car is described as salvage for a reason. Repairs are needed and these repairs can cost a lot of money when you factor in parts and labor. Getting insurance can be tricky: not all insurance companies insure cars with insured titles.

How To Decide On A Car Paint Color

1. Introduction

Choosing the right car paint color is an important decision that can have a big impact on your vehicle. The color of your car can influence its resale value, as well as how it looks and feels while you’re driving it. There are a few key factors to consider when deciding on a car paint color, such as the model and year of your vehicle, your personal style, and practicality. In this article, we’ll discuss how to decide on a car paint color so that you can make the best choice for your car.

2. Consider the Car Model and Year

The first thing to consider when deciding on a car paint color is the model and year of your vehicle. Different models may have limited options for certain colors, so it’s important to research what colors are available for your specific make and model of car. Additionally, some colors may only be available on certain years or models, so make sure to check if the color you’re interested in is offered on your particular vehicle.

3. Consider Your Style

Another factor to consider when deciding on a car paint color is your own personal style and preferences. Think about what type of look you want for your vehicle; do you prefer bold colors or more subtle shades? Do you want something classic or modern? Once you’ve identified what type of look appeals to you most, then it’s time to start researching different colors that fit within that style range.

4. Consider Practicality

It’s also important to think about practicality when choosing a car paint color; some colors may be more difficult or expensive to maintain than others. For example, dark colors tend to show dirt more easily than lighter shades, which means they require more frequent washing and waxing in order to keep them looking their best. Additionally, certain types of paint finishes may require special care in order to maintain their appearance over time; matte finishes are particularly susceptible to damage from environmental elements such as UV rays or bird droppings.

5. Choose a Color that Compliments Your Vehicle’s Design

When choosing a car paint color, it’s also important to select one that compliments the design of your vehicle; this will help ensure that the overall look is aesthetically pleasing and cohesive. Consider factors such as wheel size, trim level, body type (sedan vs SUV), etc., before making a final decision on which color will work best with all these elements combined together into one complete package.

6. Research Color Options Available for Your Car Make and Model

Once you’ve narrowed down which type of look appeals most to you personally and which colors would work best with the design of your vehicle,it’s time to start researching different options available for your make and model.You can find this information online by searching for “car paint colors” followed by the name of your make/model.This should bring up various websites that list all the different options available.It’s also worth visiting local dealerships or auto body shops in order get an idea of what actual cars look like with each particular shade.

7 Test The Colors On Your Vehicle Before Choosing

Once you’ve narrowed down which specific shades appeal most,it’s worth testing them out before making any final decisions.Many auto body shops offer services where they can spray small swatches onto vehicles so customers can see how they look in person ; this is especially helpful if there are multiple people involved in making this decision,since everyone can get an idea of how each shade appears under natural lighting conditions.

8 Get Professional Advice If Needed

>
If at any point during this process,you feel overwhelmed or uncertain about which option will work best,it never hurts to seek professional advice from an experienced automotive painter.They should be ableto provide valuable insight into which shades will be most suitable basedon their experience working with similar vehicles in the past.

9 Conclusion Deciding on a car paintcolor is an important taskthat requires careful considerationof various factors such asthe model/yearofyourvehicle,your personalstyle preferences,practicality,andhoweach shadecomplimentsthe overall designofyourvehicle.By researchingavailableoptions onlineandtesting outdifferentshadesinperson withthehelpofanexperiencedautomotivepainterifneeded,you shouldbeabletoselecttheperfectpaintcolorforyourcarwithconfidence!

A Guide to Choosing the Perfect Paint Color for Your Dream Car!

N/A

N/A

N/A

N/A

N/A

N/A

N/A

N/A

N/A

N/A

N/A

N/A

How To Adjust Your Carburetor

1. Introduction to Carburetor Adjustment

The carburetor is an integral part of any vehicle’s engine and its proper adjustment is essential for optimal performance. A correctly adjusted carburetor increases fuel economy, engine power, and reduces emissions. This article will provide an overview of the steps required to adjust your carburetor.

2. Tools and Materials Needed for Adjustment

Before beginning the adjustment process, it is important to have the necessary tools and materials on hand. These include a screwdriver, a flat-head screwdriver, pliers, a vacuum gauge, a feeler gauge set, and a wrench set. Additionally, it is important to have access to the manufacturer’s service manual for your specific make and model of vehicle in order to properly adjust the carburetor.

3. Identifying the Different Parts of a Carburetor

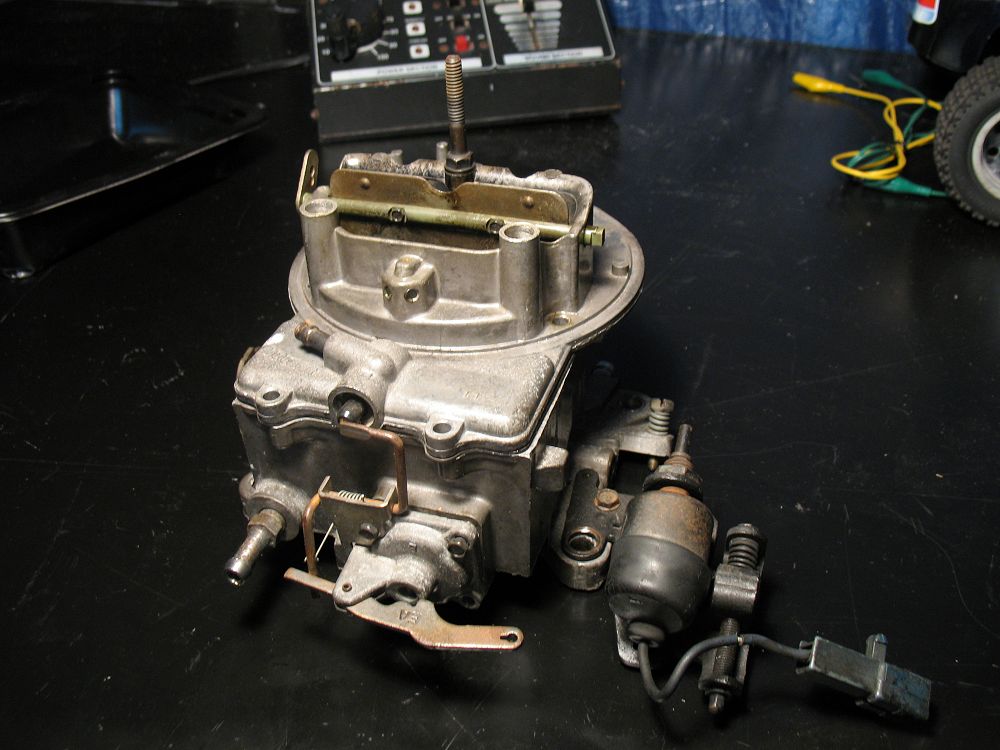
The first step in adjusting your carburetor is to familiarize yourself with its different parts and how they work together. The main components of a carburetor are the air intake, throttle plate, idle speed screw, air/fuel mixture screws, float level adjustment screw, bowl venturi adjustment screws, choke plate (if applicable), and accelerator pump diaphragm (if applicable).

4. Adjusting the Idle Speed

Once you have identified all of the components of your carburetor it is time to begin adjusting them. The first step is to adjust the idle speed by turning the idle speed screw clockwise until it stops then turning it counterclockwise 1/4 turn at a time until you reach the desired idle speed as indicated by your service manual or tachometer (if available).

5. Adjusting the Air/Fuel Mixture Screws

Next you will need to adjust the air/fuel mixture screws located on either side of your carburetor body near the baseplate. Start by turning both screws counterclockwise until they stop then turn them clockwise 1/4 turn at a time until you reach maximum engine RPM as indicated by your service manual or tachometer (if available).

6. Adjusting the Float Level and Bowl Venturi

Once you have adjusted both air/fuel mixture screws you can then move on to adjusting both float level and bowl venturi adjustments if needed. To do this you will need to use a feeler gauge set which can be purchased from any auto parts store or online retailer such as Amazon or eBay. First check that both float levels are within range according to your service manual then adjust them accordingly using either pliers or an adjustable wrench set if necessary. Next check that both bowl venturis are within range according to your service manual then adjust them accordingly using either pliers or an adjustable wrench set if necessary as well.

7. Checking for Vacuum Leaks

After all adjustments have been made it is important to check for any vacuum leaks that may be present in order to ensure optimal performance from your vehicle’s engine system overall. To do this you will need access to a vacuum gauge which can be purchased from any auto parts store or online retailer such as Amazon or eBay as well as some basic automotive tools such as pliers and wrenches sets etc.. Once connected simply start up your engine and observe any changes in pressure readings on the gauge when revving up or down slowly indicating potential leaks in certain areas of your car’s engine system that may need further inspection or repair work done accordingly before continuing with further adjustments if needed at all times while doing so safely always too!

8 Final Steps After Adjustment is Complete

After all adjustments have been made successfully it is important not only check for any potential vacuum leaks but also double check that all components are secured tightly back into place before taking off again with no further issues arising while doing so safely always too! Additionally it may be beneficial after completing all adjustments successfully too test drive your car around town with various speeds so that you can see how well everything works together overall too!

9 Conclusion

. Adjusting your carburetor can be daunting but with patience and following proper procedure outlined above anyone can do it successfully without having too much difficulty at all times while doing so safely always too! It’s also important not only double-check everything before taking off again but also keep up regular maintenance checks on all components involved in order ensure optimal performance from vehicle’s engine system overall too!

Unlock the Secrets of Optimal Performance: Learn How to Adjust Your Carburetor!

How do you adjust the fuel mixture on a carburetor?

Place the idler on the mixing screw and turn it clockwise until the needle lightly touches the base. Then turn the screw 1-1/2 counterclockwise. If there is a main throttle adjustment screw at the bottom of the carburetor float turn the screw clockwise until it seats inside the emulsion tube.

How do I know if my carburetor needs adjusting?

The engine revs must be smooth and the throttle is engaged quickly. If the vehicle shows any signs or erratic effects when using the throttle further adjustments are required.

How do you tell if a carburetor is rich or lean?

Q: How do you determine if a carburetor is rich or lean? A: One way to be sure is to read the spark plugs. If the tip is white the mixture is too thin. Brown or black means it is rich.

Does backfire mean rich or lean?

Not only will a lean air/fuel mixture cause a rich air/fuel ratio to backfire but a lean mixture will also cause backfire. A lean mixture is not enough fuel and too much air.

What makes more power rich or lean?

A rich mixture is more common and harmless to the engine. For a slightly richer mixture you may see lower engine efficiency and worse fuel economy but a richer mixture makes more power and actually burns more coolant.

Is it better to run too rich or too lean?

Neither is ideal but running lean is generally worse in the long run because it does more damage. Lean running can overheat the engine. In extreme conditions it can melt or seize the piston.

10 Best Car Air Fresheners

10 Best Car Air Fresheners

Introduction

Car air fresheners are a great way to keep your car smelling fresh and clean. Whether you’re looking for something that will give your car a pleasant scent or something that will help eliminate odors, there are a variety of car air fresheners on the market today. In this article, we’ll take a look at 10 of the best car air fresheners available.

Types of Car Air Fresheners

There are several types of car air fresheners available, including aerosol sprays, gels, vent clips, hanging tree-style fresheners, and charcoal bags. Each type has its own advantages and disadvantages. Aerosol sprays provide an instant burst of scent but can be overpowering and may cause irritation if inhaled directly. Gels offer a more subtle scent that lasts longer than aerosols but can be messy to use. Vent clips are convenient as they attach directly to your vehicle’s air vents and provide continuous scent release over time. Hanging tree-style fresheners offer a more decorative option with various scents available while charcoal bags absorb odors without the need for any chemicals or fragrances.

Top 10 Best Car Air Fresheners

Now let’s take a look at 10 of the best car air fresheners currently on the market:

Little Trees Black Ice

Little Trees Black Ice is one of the most popular car air freshener options on the market today. It offers an intense fragrance that lasts up to four weeks in your vehicle and comes in several different scents including original black ice, new car smell, vanilla pride, and royal pine. The Little Trees Black Ice is easy to use – simply remove it from its packaging and hang it from your rearview mirror or other part of your vehicle interior for an instant burst of freshness.

Ozium Smoke & Odors Eliminator Gel

The Ozium Smoke & Odors Eliminator Gel is designed to eliminate smoke and other odors from your vehicle quickly and effectively without leaving behind any residue or strong fragrances. The gel comes in an easy-to-use container that can be placed anywhere in your vehicle for maximum odor elimination power. The Ozium gel is non-toxic and safe for use around children and pets so you can enjoy freshness without worry!

Refresh Your Car Vent Clip Air Freshener

The Refresh Your Car Vent Clip Air Freshener offers a convenient way to keep your car smelling great all day long without having to worry about refilling or replacing it every few days like some other products require. This vent clip works by releasing small amounts of fragrance over time so you get continuous freshness throughout the day without being overwhelmed by strong smells when you first enter your vehicle. Choose from several different scents such as new car smell, tropical escape, cool linen, wild berry blast, and many others!

Yankee Candle Car Jar Ultimate Hanging Air Freshener

The Yankee Candle Car Jar Ultimate Hanging Air Freshener is perfect for those who want something with a bit more style than just an ordinary vent clip or aerosol spray – this hanging air freshener features a glass jar with an attractive design that adds some visual appeal to any interior space while still providing powerful odor elimination power thanks to its special odor eliminating technology. Choose from several different scents such as black coconut, pink sands beach walk, crisp fall night, midnight jasmine breeze, among many others!

California Home Goods Bamboo Charcoal Air Purifying Bag

The California Home Goods Bamboo Charcoal Air Purifying Bag is perfect for those who don’t want any added fragrances but still want effective odor elimination power – this bag uses natural bamboo charcoal which absorbs odors naturally without using any chemicals or fragrances so it’s safe for use around children and pets too! Simply place this bag in any area where you want to reduce odors such as under seats or inside cup holders for maximum effectiveness!

Chemical Guys New Car Smell Premium Air Freshening Kit

The Chemical Guys New Car Smell Premium Air Freshening Kit is perfect for those who want their vehicle interior smelling like it just rolled off the showroom floor! This kit includes everything you need – two bottles of premium new car smell concentrate (which can be diluted with water), two spray bottles so you can apply it directly onto fabrics such as carpets or upholstery for quick results; plus two premium vent clips which slowly release a pleasant scent throughout your entire vehicle interior over time!

Febreze Unstopables Fresh Vent Clips

If you’re looking for something more modern than traditional tree-style hanging air fresheners then check out Febreze Unstopables Fresh Vent Clips – these clips feature advanced odor elimination technology combined with Febreze’s signature Unstopables fragrance which provides long lasting freshness throughout your entire vehicle interior even after months of use! Plus they come in several different scents such as lavender vanilla blissful escape among others!

Conclusion

No matter what type of car air freshening product you choose there are plenty of options available on the market today – whether you prefer aerosol sprays gels vent clips hanging tree-style products or charcoal bags there’s sure to be something out there that meets all your needs when it comes to keeping your vehicle smelling great all day long!

Discover the Top 10 Car Air Fresheners to Keep Your Vehicle Smelling Fresh!

What do car detailers use to make your car smell good?

The most popular car deodorant sprays are Vanilla Bean New Car Smell and Free Breeze. This car deodorant spray not only refreshes the smell in the car but also deodorizes and deodorizes the car. …

What air freshener actually smells like new car?

Chemical Guys New Car Air Freshener is designed to mimic the smell of a new car. All Chemical Guys fragrances are naturally formulated and blended to mimic that new car smell without harming you or the environment.

What car scent do car dealers use?

Original Factory Scent™ is used extensively in car dealerships and car auctions to increase the attractiveness of vehicles to customers. Used car dealers use it to reduce smoke odors increase the marketability of used cars and move them through parking lots faster.

Why is new car smell so good?

That new car smell we love is caused by a combination of chemicals called volatile organic compounds (VOCs). Various interior components including various plastic fabrics and adhesives used during vehicle manufacturing contain these VOCs.

What gives a car that new smell?

New car odor is made up of a group of chemicals called volatile organic compounds or VOCs for short. These VOCs can be found in plastic clothing adhesives and other wastes used in automotive manufacturing.

How long does Bath and Body car fragrance last?

4-6 weeks
Refreshes and renews for 4-6 weeks. Perfect for your daily commute, long road trips and everything in between. Pairs with your favorite car fragrance holder (sold separately)

How To Calculate The Diminished Value Of Your Car

1. Introduction

When a car is involved in an accident, it can suffer a significant loss in its value due to the damage that has been done. This is known as diminished value, and it can be difficult to calculate the amount of this loss. In this article, we will discuss how to calculate the diminished value of your car, as well as what factors can affect the amount of this loss.

2. What is Diminished Value?

Diminished value is defined as the decrease in a vehicle’s market value after suffering damage from an accident or other incident. This type of loss can be difficult to quantify, as it depends on several factors such as the age of the vehicle, its condition before and after the incident, and even its make and model.

3. Types of Diminished Value

There are two types of diminished value: immediate diminished value (IDV) and inherent diminished value (IDV). Immediate diminished value refers to the difference between a car’s pre-accident market value and its current market value after being damaged in an accident. Inherent diminished value refers to the difference between a car’s pre-accident market value and what it would have been worth had it not been damaged in an accident at all.

4. Calculating the Diminished Value of Your Car

Calculating your car’s diminished value requires some research into its current market values before and after being damaged in an accident. This can be done by looking up similar vehicles for sale online or consulting with a local auto appraiser who specializes in assessing vehicles for their pre-accident market values. Once you have these figures, you can then subtract one from the other to determine your car’s diminished value.

5. How to Estimate the Amount of Diminished Value

If you do not want to go through all of the steps necessary to calculate your car’s exact diminished value, you can also estimate it based on certain factors like mileage, condition before and after the accident, make/model/year, etc. For example, if your car was worth $20,000 before being damaged in an accident but only $15,000 afterwards then you could estimate that your vehicle has suffered about 25% in diminished value ($5k/$20k = 25%).

6. Factors That Affect The Amount Of Diminished Value

Several factors will affect how much your vehicle has lost due to diminishing values such as:

-The severity of damage done during an accident
-The age/condition/make/model/year of your vehicle
-The current market values for similar vehicles that were not involved in accidents

7 How To Claim For Diminished Value Losses?

In order to claim for any losses due to diminishing values caused by an accident or other incident involving your vehicle you must first contact your insurance provider with proof that you have suffered such a loss (e.g., evidence from auto appraisers or online research). Your insurance company may require additional documentation such as repair bills or photos showing damages done during an incident before they will consider paying out any claims related to diminishing values caused by accidents or incidents involving your vehicle(s).

8 Conclusion

Calculating a vehicle’s diminished value can be difficult but it is important if you have experienced any losses due to damage caused by an accident or other incident involving your car(s). By understanding what factors affect diminishing values and researching similar vehicles for sale online or through auto appraisers you can get a better idea of how much money you may be entitled too due to these losses suffered by your vehicle(s).

9 Frequently Asked Questions (FAQs)

Q: What is considered “diminishing values?”
A: Diminishing values refer to any decrease in a vehicle’s market price due to damage caused by an accident or other incident involving that same vehicle(s).
Q: How do I calculate my cars diminishing values?
A: To calculate your car’s diminishing values you need research into its current market prices before and after suffering damages from an incident; this includes looking up similar vehicles for sale online or consulting with local auto appraisers who specialize in assessing vehicles for their pre-accident market prices; once these figures are obtained then subtract one from another which should give you a good idea on how much money has been lost due because of decreasing prices related damages done during incidents involving said vehicle(s).

Discovering the True Cost of Your Car: A Guide to Calculating Diminished Value

How do you calculate depreciation on a car after an accident?

First, go to NADAs website to get a sales value. If the NADA value for your vehicle is $20,000, calculate the base loss of value by using a 10 percent cap. Simply multiply $20,000 by 10 percent. The result is $2,000, which represents the highest amount a car insurer will pay for a diminished value claim under formula c.

How much does body damage affect car value?

The loss in value is between 40 and 60 percent in many cases and you will not make money when you sell or trade with them. Even some new car dealers wont take a vehicle into the business if it appears to have been in an accident. Any person who carries out repair work.

Is diminished value negotiable?

Anyone who feels they have not been adequately compensated by their insurance company after an accident can try to negotiate with their insurance company. Therefore it is best to arm yourself with some basic knowledge and facts before attempting to negotiate.

How do I write a diminished value claim letter?

Therefore I am seeking compensation for my depreciated vehicle at [DV Valuation Fee] (this only includes the valuation fee due to additional indirect loss). I am reasonable and just want compensation for my losses.

How do insurance adjusters calculate depreciation?

Depreciation is generally calculated by estimating an items replacement value (RCV) and its expected useful life. RCV represents the equivalent cost to repair or replace the item and life is the expected average life of the item.

Does an insurance company have to pay depreciation value?

Should insurance companies pay bad claims? Insurance companies may have to pay defect claims depending on state law and who is at fault. Check these two places to find out: Your car insurance contract.