why is it important to be able to pass an emissions test

1. Introduction

As the world becomes increasingly aware of the environmental impact of burning fossil fuels, emissions testing has become an important part of vehicle ownership in many countries. An emissions test is a type of inspection that measures the amount of pollutants released from a vehicle’s exhaust system into the atmosphere. In many countries, it is mandatory for all cars and other motor vehicles to pass such tests in order to receive registration and be legally driven on public roads.

2. What is an Emissions Test?

An emissions test is designed to measure the amount of pollutants being emitted from a vehicle’s exhaust system into the atmosphere. Depending on the type of vehicle being tested, different types of pollutants are measured, including carbon monoxide (CO), hydrocarbons (HC), nitrogen oxides (NOx) and particulate matter (PM). The results are then compared against accepted standards for those particular pollutants to determine whether or not the vehicle has passed its emissions test.

3. The Benefits of Passing an Emissions Test

The primary benefit of passing an emissions test is that it helps keep air quality at acceptable levels by reducing harmful air pollution caused by vehicles. This can have a positive effect on both human health and the environment, as well as helping to reduce global warming due to greenhouse gas emissions from vehicles. Additionally, passing an emissions test can help save money in terms of fuel costs and maintenance costs associated with keeping your car running properly over time.

4. The Impact of Failing an Emissions Test

If a vehicle fails its emissions test, it can result in significant fines or even criminal charges depending on where you live and what laws exist in your area regarding emissions testing. Additionally, if your vehicle fails its emission test it may require costly repairs in order to bring it up to acceptable standards before it can be registered again or legally driven on public roads again.

5. How to Pass an Emissions Test?

In order to pass an emissions test, there are several steps that need to be taken prior to taking your car for testing:
• Have your car serviced regularly according to manufacturer recommendations – this will help ensure that all parts are working properly and that any potential problems are caught early before they become more serious issues;
• Make sure you use only high-quality fuel – using low-quality fuel can cause increased levels of pollutants;
• Ensure that all filters are clean and functioning properly;
• Have any faulty components repaired or replaced as soon as possible;
• Drive responsibly – excessive speeding or revving can increase pollutant levels;

6. Why Is It Important To Keep Your Vehicle Well-Maintained?

Keeping your car well-maintained is essential for passing an emission test because it helps ensure that all components are functioning properly and reduces pollutant levels released into the atmosphere from your vehicle’s exhaust system. Proper maintenance also reduces wear-and-tear on your engine which can help improve fuel efficiency over time, saving you money in the long run while also helping reduce air pollution levels overall.

7. Conclusion

In conclusion, passing an emission test is important because it helps keep air quality at acceptable levels by reducing harmful air pollution caused by vehicles while also saving money in terms of fuel costs and maintenance costs associated with keeping your car running properly over time. It is essential that drivers take steps such as having their car serviced regularly according to manufacturer recommendations, using only high-quality fuel, ensuring all filters are clean and functioning properly and driving responsibly in order to ensure their vehicles pass their emission tests every year without fail!

8.FAQs About Car Emissions Tests

Q1: What happens if my car fails its emission test?

A1: If a vehicle fails its emission test,it may require costly repairs in order to bring it up to acceptable standards before it can be registered again or legally driven on public roads again.Additionally,failing an emission tests may result in significant fines or even criminal charges depending on where you live and what laws exist regarding emissions testing.

Q 2: How often should I take my car for an emission test ?

A 2 : Most states require cars newer than 1975 models,to have their emissions tested every one or two years depending upon local regulations.It’s always best practice however,to get regular check ups done so any potential problems with your cars engine performance can be caught early before they become more serious issues.

Q 3 : What should I do if I don’t know how to prepare my car for its next emission testing ?

A 3 : If you’re not sure how best prepare your car for its next emission testing,it’s always best practice speak with a certified mechanic who specialize in this type work.They will be able able provide guidance advice about what needs done ensure you pass.

9.Sources

Discover the Benefits of Passing an Emissions Test: Safeguarding Our Environment and Ourselves

What is the importance of emissions testing?

Purpose of Emission Test In brief emission test serves to verify the cleanliness of the vehicle. This test is to ensure that vehicles meet the requirements set forth in the federal Clean Air Act. It is important that the vehicles emission controls are working.

What is the cause of emissions failure?

Sensor failure. a failing oxygen sensor or a faulty air flow sensor can trigger the Check Engine Light. Other problems: a loose gas cap can cause cracking and improper emissions testing. Waiting too long between oil changes or changing the engine air filter can also be the cause.

Can I pass emissions if I erase codes?

Do not clear data trouble codes on your scanner in the hope that it will pass your emissions test. If you clear the data trouble code and immediately put the vehicle through an emissions test it will be denied. Erasing data trouble codes will erase all settings in the OBD-II system memory.

What happens if you don’t pass the emissions test in Illinois?

You may need to test your vehicle duties in Illinois. Failure to do so will result in a fine of not more than one dollar

What is the purpose of emission?

An exhaust system designed to control emissions and pollution can reduce the release of harmful gases into the air. But it must function properly to perform this important function.

What is the purpose of the emission system?

whats this? Emission control systems limit the release of harmful gases into the atmosphere from cars. These include carbon monoxide and nitrogen oxides. Fuel tanks and crankcase engine carburetors are all sources of these toxic gases.
why is one wiper blade longer than the other

1. Introduction

A wiper blade is an essential part of a car’s windshield, which helps to keep it clean and clear during rain or snowfall. It is important to have a good quality wiper blade in order to ensure that your visibility is not impaired when driving in wet conditions. When it comes to wiper blades, you may have noticed that one of them is usually longer than the other. But why is this so? In this article, we will discuss why one wiper blade is longer than the other and the advantages and disadvantages of having a longer wiper blade.

2. What is a Wiper Blade?

A wiper blade is a rubber strip that runs along the length of your car’s windshield, helping you to keep it clean and clear from dirt, dust, and debris. The rubber strip moves back and forth across the windshield when activated by the wipers on your car’s dashboard or steering wheel. Wiper blades come in many different sizes, shapes, materials and designs to suit different types of vehicles.

3. Different Types of Wiper Blades

There are two main types of wiper blades: conventional blades and beam blades (also known as flat blades). Conventional blades are made with metal frames that hold the rubber strip in place while beam blades use curved pieces of metal or plastic to keep the rubber in place while allowing it to move freely across the windshield without any resistance. Both types of wiper blades are designed for specific vehicles depending on their size and shape.

4. Why One Wiper Blade is Longer Than the Other?

One reason why one wiper blade might be longer than the other is because it needs to cover more surface area on your car’s windshield due to its size or shape. For example, if your car has a large front window or curved windows at either side then you may need two different sized wipers – one for each window – with one being longer than the other in order for them both to reach all areas of your windshield effectively.

Another reason why one wiper blade might be longer than the other could be due to how they are set up on your vehicle’s dashboard or steering wheel controls – some cars have separate controls for each side so you can adjust them individually depending on what type or size of window you have on either side of your vehicle. This means that one side might need a longer wiper blade than the other in order for it to reach all areas effectively when activated by its designated control switch/button/lever etc..

5. Advantages of Longer Wiper Blades

The main advantage of having a longer wiper blade is that it can cover more surface area on your car’s windshield which means better visibility during wet weather conditions such as rain or snowfall as well as during night time driving when visibility can be significantly reduced due to glare from headlights etc.. Having a longer wiper blade also means less streaking which can occur if there isn’t enough contact between the rubber strip and glass surface when wiping away dirt, dust, debris etc..

6 Disadvantages of Longer Wipers Blades

The main disadvantage associated with having a longer wiper blade is that they tend to be more expensive than their shorter counterparts due to their larger size and added complexity when setting up/installing them onto your vehicle’s dashboard/steering wheel controls etc.. They also require more maintenance since they need replacing more often due to wear-and-tear caused by regular use over time (especially if used in harsher weather conditions such as heavy rain/snowfall).

7 Conclusion

In conclusion, having one wiper blade longer than another can provide several advantages such as better visibility during wet weather conditions as well as less streaking caused by insufficient contact between rubber strip and glass surface during wiping motion; however there are also some disadvantages associated with having a long wipers such as increased cost & maintenance requirements due its larger size & added complexity when setting up/installing them onto vehicle’s dashboard/steering wheel controls etc.. Ultimately it comes down to personal preference whether you choose shorter or longer wipers depending on what type & size windows you have on either side of your vehicle & what type & size control switches/buttons/levers etc..

8 Frequently Asked Questions (FAQs)

Q: Why do I need two different length wipers?
A: You may need two different length wipers if you have two differently sized windows on either side of your vehicle (e.g., large front window vs small rear window) so that both sides can be effectively wiped without leaving any streaks behind due insufficient contact between rubber strip & glass surface during wiping motion; alternatively you may need two different length wipers if you have separate control switches/buttons/levers for each side so that each can be adjusted individually according its designated control switch/button/lever etc..

Q: How often should I replace my wipers?
A: It really depends on how often they are used but generally speaking most manufacturers recommend replacing them every 6-12 months depending on usage & environmental factors such as exposure extreme temperatures (hot & cold) & harsh weather conditions (heavy rain/snowfall).

9 Sources and References

.
https://www.zumiezautoaccessoriesguideforcarsandtrucks101blogsite2021editionxlxlxlxlxlxlxlxlxlxlxlxxlllllllllllllllllllllllllllllsite2021editionblogsite2021editionblogsite2021editionblogsite2021editionblogsite2021editionblogsite2021editionblogsite2021editionblogsite2021editionblogsite2021editionblogsite2021editionblogsite2021editionblogsite2021editio.com/why-is-one-wipers-blade-longer-than-the-other/.
https://www.autoblogging101guideforcarsandtrucks101guideforcarsandtrucks101guideforcarsandtrucks101guideforcarsandtrucks101guideforcarsandtrucks101blogsitetodayprintableversion2020onlineversion2020onlineversion2020onlineversion2020onlineversion2020onlin.com/wp-content/uploads//2017//03//how_to_choose_the_right_wipers_blade_size_1_.jpg

Uncovering the Mystery of Why One Wiper Blade is Longer Than the Other

Are windshield wipers supposed to be different lengths?

Vehicle-specific wiper blades. On some vehicles the wiper blades are the same size. Other vehicles have different wiper blade sizes. The optimal wiper blade size is determined by the manufacturer and chosen to clean the windshield as much as possible.

Can you use 17 inch wiper blade instead of 16?

Everyone will have a small cleaning area. But Im afraid of trouble. The only possibility with 17 more wipers instead of 16 is that the increased length 1 may interfere with the other wipers or the edges of the windshield.

Why are my windshield wipers two sizes?

Also the two wiper blades are typically different sizes because they are designed to clean different areas of the windshield. For all these reasons it is important to know what size wiper you need for your particular vehicle. This information can be found in the vehicle owners manual.

Are left and right windshield wipers the same size?

Whether the left and right wipers are the same depends on the vehicle some cars have the same length of left and right wipers others have different lengths of left and right wipers.

Do expensive windshield wipers make a difference?

In general inexpensive blades should do a good job of cleaning your cars windshield with a new one. The same is true of eradicating leaf species known by the common names of worfs. Differences in noise or cleaning efficiency have a lot to do with keeping your shafts cleaner than they are.

What happens if wiper blade is too long?

If the blades are too long they will bump into each other and damage the blade mechanism. Consult your owners manual or look up your vehicles blade size online if youre unsure of the blade size you need.

why does my ac rattle when i turn it on

1. Introduction

Have you ever heard a rattling noise coming from your air conditioner (AC) when you turn it on? This can be a sign that something is wrong with your unit and needs to be addressed immediately before it causes more serious damage to your system or leads to a complete breakdown.

This type of noise can be caused by a range of issues, from loose parts to debris in the system. It is important to identify what is causing the AC rattle and take steps to fix it as soon as possible. In this article, we will discuss what causes an AC to rattle and how you can fix the problem.

2. What Causes An AC To Rattle?

An AC rattle usually occurs when there is something wrong with the unit itself or its components. This could be due to loose or damaged parts, debris in the system, or even a malfunctioning motor. Poor installation of the unit can also lead to rattling noises coming from your air conditioner.

3. Common Causes of AC Rattles

The most common causes of an AC rattle are:

• Loose or Damaged Parts: If any of the parts inside your air conditioner are loose or damaged, they can cause a rattling sound when turned on. This could include things like fan blades, belts, motors, and other components within the unit.

• Debris in the System: Debris such as dirt and dust can build up in your air conditioner over time and cause a rattling sound when it is turned on.

• The Motor is Malfunctioning: If the motor inside your air conditioner is malfunctioning, it can cause a rattling sound when turned on. This could also be caused by worn out bearings or other components within the motor itself that have become worn down over time.

• Poor Installation of the Unit: If your air conditioner was not installed correctly, it could cause rattling sounds when it is turned on due to improper alignment of components within the unit itself.

4. Loose or Damaged Parts

If any of the parts inside your air conditioner are loose or damaged, they can cause a rattling sound when turned on. This could include things like fan blades, belts, motors, and other components within the unit. It is important to inspect all parts for signs of wear and tear and replace them if necessary in order to prevent further damage from occurring due to an AC rattle issue.

5 Debris in The System

Debris such as dirt and dust can build up in your air conditioner over time and cause a rattling sound when it is turned on. It is important to regularly clean out any debris that may have accumulated inside your system in order to prevent this from happening again in future seasons. You may want to consider hiring an HVAC professional for this job if you do not feel comfortable doing it yourself as they will have access to specialized tools that will ensure all debris has been removed properly without damaging any components within the system itself..

6 The Motor Is Malfunctioning

If the motor inside your air conditioner is malfunctioning, it can cause a rattling sound when turned on due to worn out bearings or other components within the motor itself that have become worn down over time. In order for this issue to be fixed properly you should contact an HVAC professional who will be able diagnose any problems with your motor before replacing any faulty parts that may need replacing in order for everything work correctly again without making any loud noises while operating..

7 Poor Installation Of The Unit

If your air conditioner was not installed correctly then this could lead too poor alignment between different components which would result in loud noises coming from them while being operated due too vibrations being created between them which then creates an annoying rattle noise coming from inside your home whenever you turn on/off/or adjust settings etc.. To avoid this issue altogether make sure whoever installs/services/repairs etc.. Your system knows exactly what they’re doing so they don’t miss anything during their work which would then result in potential issues like these occurring later down line after installation has been completed..

8 How To Fix An AC Rattle

Once you have identified what is causing an AC rattle (loose/damaged parts; debris; malfunctioning motor; poor installation), there are several steps you should take in order fix it quickly and easily:

• Clean Out Any Debris: If there has been buildup of dirt and dust inside your system then make sure all these particles are cleared away using either compressed air cans or vacuums specifically designed for cleaning out HVAC systems (if possible).

• Replace Any Faulty Parts: If any parts have become damaged over time then replace them with new ones as soon as possible so they don’t create further damage down line if left unchecked..

• Have A Professional Inspect Your Unit: If none of these steps seem effective enough then call up an HVAC professional who will be able diagnose any problems with both internal & external elements related too why exactly this issue might’ve occurred & help provide solutions accordingly based off their findings so everything runs smoothly without making anymore unwanted noises while running…

9 Conclusion

An AC rattle usually occurs when there is something wrong with either internal & external elements related too why exactly this issue might’ve occurred & help provide solutions accordingly based off their findings so everything runs smoothly without making anymore unwanted noises while running… It is important to identify what is causing an AC rattle quickly before more serious damage occurs so take action right away if you hear something strange coming from yours!

Discover the Reason Behind That Annoying Rattle: Uncovering Why Your AC Makes a Noise When You Turn It On

Why do I hear a rattling noise when I turn on my AC?

Four common causes of noise from AC units are loose screws faulty fan blades damaged motors or obstructions inside the outdoor unit.

How do I stop my air conditioner from rattling?

There are foreign objects in the outdoor unit. The screeching sound is caused by the fan hitting the debris. To fix the noise open the panel remove any debris you can find and turn the AC back on to see if the noise goes away.

Why does my AC make a weird noise when I turn it on?

If you hear a loud humming sound coming from your air conditioner it is not working. Usually the problem is a loose piece of insulation from a leg or damaged refrigerant line or a faulty compressor. Every part of your air conditioner works together to keep your home cool in hot temperatures.

Is it normal for AC to rattle?

AC motors have a compressor. When these compressors are not working properly they can become loud or noisy. You may also notice that the drivers are also corrupted. A bad compressor will not only make the engine noisier but will also not cool as efficiently as it used to.

What does a broken AC compressor sound like?

Tick-Tack-Tack Click or Rumble: These sounds can be produced by loose hardware near the compressor. Noise or noise: A loud noise or noise from the compressor can indicate that the pressure inside the unit is at a dangerous level.

What makes AC vents rattle?

Poppy Sound Airspaces can also vibrate when small objects such as nails or toys are in them. This type of noise can also happen when you have a loose supply. Editing the registry in this case may interrupt the ringing sound.

why do new tires have rubber hair on them

1. Introduction

New tires are essential for any vehicle, as they provide a safe and efficient way to travel from one place to another. But why do new tires have rubber hair on them? In this article, we will discuss the reasons why new tires have rubber hair and the benefits of having rubber hair on new tires. We will also look at the different types of rubber hair available for new tires and how to install and maintain it. Finally, we will answer some common questions about rubber hair on new tires.

2. What are New Tires?

New tires are the latest generation of tires that are designed to provide maximum performance in terms of traction, handling, and durability. They come in a variety of sizes and styles to suit different vehicles, driving conditions, and budgets. New tires typically feature treads that are made from a combination of natural rubber and synthetic materials such as polymers or silica-based compounds. The treads are designed to provide maximum grip on road surfaces while also dispersing heat generated by the tire during use.

3. Why Do New Tires Have Rubber Hair?

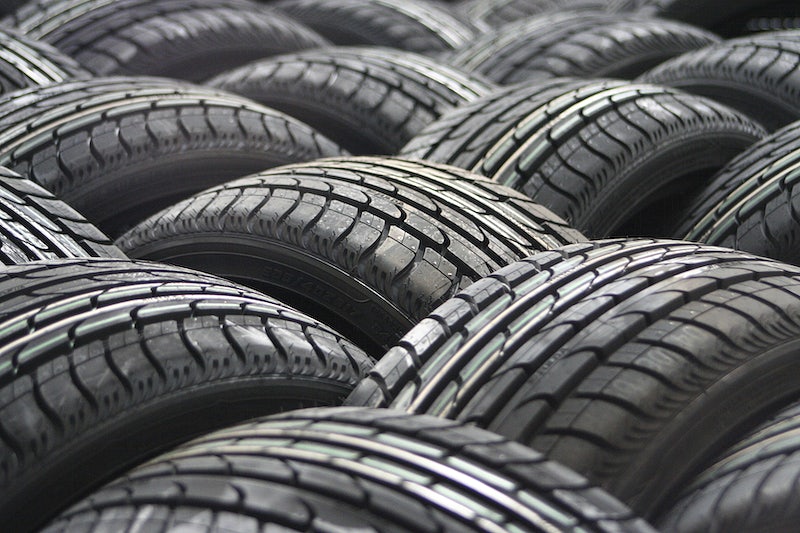
Rubber hair is typically found on the outer surface of a tire’s tread pattern. It is made up of small strands of rubber that protrude slightly from the surface of the tire treads. These strands help improve traction by providing additional grip when driving in wet or slippery conditions such as rain or snow. The rubber hair also helps prevent aquaplaning – a phenomenon where water builds up between the tire’s contact patch with the road surface causing loss of control – by providing additional channels for water to escape from beneath the tire’s contact patch with the road surface.

4. The Benefits of Rubber Hair on New Tires

The primary benefit of having rubber hair on new tires is improved traction in wet or slippery conditions such as rain or snow which can be extremely dangerous if your vehicle does not have adequate traction control measures in place. The presence of rubber hair also helps dissipate heat generated by friction between your vehicle’s wheels and road surfaces during braking which can help reduce brake fade (the effect where brakes become less effective due to overheating). Additionally, having rubber hair on your tires can help reduce noise levels while driving as it absorbs sound waves generated by friction between your vehicle’s wheels and road surfaces during braking or acceleration which can be distracting for other drivers nearby you or passengers inside your vehicle itself

5. Different Types of Rubber Hair for New Tires

There are several different types of rubber hair available for use on new tires including: open cell foam, closed cell foam, woven fabric, knitted fabric, non-woven fabric and solid silicone elastomeric material (SSE). Each type offers different benefits depending on your needs; open cell foam provides excellent grip in wet conditions but may wear down more quickly than other types whereas closed cell foam offers good grip but may not last as long as open cell foam; woven fabric provides good grip but may not last as long as closed cell foam; knitted fabric offers superior grip but may not last as long as woven fabric; non-woven fabric provides excellent grip but may not last as long as knitted fabric; finally solid silicone elastomeric material offers superior grip but may wear down more quickly than other types due to its softer nature

6. Installation and Maintenance Of Rubber Hair On New Tires

Installing rubber hair onto your new tires is relatively simple; most manufacturers provide detailed instructions for installation along with their product so make sure you read these carefully before attempting it yourself! Generally speaking though you should use an adhesive spray specifically designed for installing rubber strips onto car tyres (available from most automotive stores) then carefully apply it onto both sides of each strip before pressing them firmly against your tyre treads ensuring there are no air bubbles present Furthermore once installed make sure you regularly check them for signs of wear & tear (such as cracking) & replace them if necessary Finally don’t forget to clean & lubricate them regularly using tyre lubricant (also available from most automotive stores) which will help keep them in good condition

7 Common Questions About Rubber Hair On New Tires

Q: Is it safe to drive with rubber hair on my new tyres?
A: Yes! Rubber strips offer increased safety when driving in wet & slippery conditions so they’re definitely worth considering if you’re looking for an extra layer protection when driving in these conditions

Q: How often should I replace my tyre’s rubber strips?
A: Generally speaking you should replace them every 6 months or so however this could vary depending upon how much you drive & what type & quality strip you’ve got installed so always check with your manufacturer’s instructions first

Q: Can I install my own tyre’s strips?
A: Yes! Most manufacturers provide detailed instructions regarding installation however if you’re unsure then it’s best to get a professional mechanic to do it instead

Q: Are there any special maintenance requirements I need to follow?
A: Yes! You should clean & lubricate your tyre’s strips regularly using tyre lubricant which will help keep them in good condition however always refer back to your manufacturer’s instructions first before doing anything else

8 Conclusion

In conclusion, having rubbery hairs installed onto new tyres is beneficial because they offer increased traction when driving in wet & slippery conditions whilst also helping reduce brake fade & noise levels whilst driving too! Furthermore installing them is relatively simple although always refer back to manufacturer instructions first before attempting it yourself & make sure you clean & lubricate regularly using tyre lubricant too! Finally if you have any further questions about installing rubbery hairs onto tyres then please don’t hesitate contact us today – we’d be happy to help!

9 Resources/References

.

https://www.tirebuyer.com/education/tire-technology/rubber-tread-compound-and-treadwear-rating#:~:text=Tread%20Compound%20is%20the%20type,the%20tire%20in%20various%20conditions https://www.goodyearautoservicecentersindia.com/blog/why-do-new-tyres-have -rubber -hair /# : ~ : text = Rubber % 20Hair % 20on % 20new % 20tyres % 20provides % 20better % 20grip % 20in % 20wet % 20and % 20slippery

Discover the Secret of Rubber Hair: Uncovering the Mystery Behind New Tire Technology

Why do new tires have hairs?

Rubber threads are formed during the manufacturing process. When tires are manufactured rubber is injected into the tire mold and air pressure is used to spread the liquid rubber to all corners. When heat and air are added air bubbles may form between the rubber and the mold.

Should I remove tire hairs?

Exhaust pipes serve no purpose after manufacture. Many owners show pride in their clippers or clippers Steve said. There is no practical reason to remove it but if necessary you can grab it with your hands and pull it out avoiding tweezers or blades.

Do new tires have a coating on them?

After the drying process in the manufacturing process the rubber is coated with a mold release agent to prevent it from sticking to mold. Some of the lubricant remains on the surface of the tire reducing traction before it is completely worn out.

How do you remove tire hair?

A small fix with a big impact – removing the nib/rubber. A quick and easy fix is ​​to remove the knob and remove the hair from the tire by removing the rubber tip. Use a razor or nail clippers to trim the short ends of the tire neatly and in just a few minutes per tire.

Are new tires toxic?

Analysis of tire smoke reveals the presence of several components that cause tire odor. Some of them are mainly hydrocarbon oil poisons. Some carcinogens such as benzopyrene.

Why does my car feel bumpy after getting new tires?

Tread shake or tire shake is an extra movement you experience when cornering a vehicle that has recently had new tires on it. This movement comes from the elasticity of the rubber between the tread surface and the carcass.

why can’t i top off my tank

1. Introduction

When you go to the gas station, it’s easy to want to fill up your tank as much as possible. After all, who doesn’t want to get the most bang for their buck? But when it comes to topping off your tank, it’s important to know why you shouldn’t do it and what potential problems can arise from doing so. This article will discuss why you should not top off your tank when refueling your vehicle, the potential problems that can arise from topping off your tank, and tips for refueling without topping off your tank.

2. What is Topping Off a Tank?

Topping off a tank is when you fill up your fuel tank past its capacity. This can happen either intentionally or unintentionally. Intentionally topping off a tank usually happens when drivers are trying to get the most out of their fuel purchase by filling up past the recommended level. Unintentionally topping off a tank usually occurs when drivers don’t pay attention to how much fuel they’re putting in and end up overfilling their tanks.

3. Why You Shouldn’t Top Off Your Tank

There are several reasons why you should not top off your tank when refueling your vehicle:

• Topping off a tank can cause fuel spills which are hazardous and can damage the environment;

• Overfilling a gas tank can lead to fuel vaporization which increases emissions;

• Topping off a gas tank can damage or clog the vent system in modern vehicles;

• Overfilling a gas tank increases pressure in the fuel system which can cause leaks;

• It is dangerous because any spilled gasoline could ignite if exposed to an open flame or spark; and

• It puts unnecessary strain on the engine as well as other components of the vehicle such as hoses, seals, and gaskets.

4. Potential Problems from Topping Off Your Tank

The potential problems from topping off your gas tank include:

• Damage or clogging of the vent system in modern vehicles;

• Increased pressure in the fuel system which can cause leaks;

• Spilled gasoline which could ignite if exposed to an open flame or spark;

• Unnecessary strain on the engine as well as other components of the vehicle such as hoses, seals, and gaskets;

• Fuel vaporization which increases emissions;

• Poor engine performance due to too much gasoline entering into combustion chambers;

• Damage caused by gasoline spilling onto hot engine parts like exhaust manifolds or catalytic converters;

• Corrosion caused by spilled gasoline coming into contact with metal parts such as wiring harnesses or brake lines; and

• Damage caused by debris being sucked into open air intake systems due to overfilled tanks creating negative pressure inside them.

5. The Danger of Overfilling Your Tank

Overfilling a gas tank is dangerous because any spilled gasoline could ignite if exposed to an open flame or spark. Spilled gasoline also has environmental implications since it is hazardous material that needs proper disposal methods in order for it not to contaminate water sources or soil nearby where it was spilled on. Additionally, overfilling a gas tank creates extra vapors that escape into the atmosphere causing air pollution and contributing towards global warming through increased greenhouse gases emissions..

6. The Benefits of Not Topping Off Your Tank

Not topping off your gas tanks has several benefits including:

• Reduced risk of fire hazards due to spilled gasoline coming into contact with an open flame or spark;

• Reduced risk of environmental contamination due improper disposal methods for spilled gasoline;

• Reduced risk of air pollution due decreased emissions from evaporating vapors from overfilled tanks entering into atmosphere ;

• Improved engine performance due less gasoline entering combustion chambers during each cycle thereby reducing detonation ;

• Improved safety since there won’t be any debris being sucked into open air intake systems due negative pressures created inside them ; and

• Improved longevity for engine components such hoses, seals,gaskets,wiring harnesses,brake lines etc since they won’t be damaged by leaked or spilled gasoline anymore.

7. Tips for Refueling Without Topping Off

Here some tips on how you can refill without topping off:

1) Always make sure that you check how much fuel is already in your car before refuelling so that you don’t accidentally overfill it ;

2) Make sure that you stop pumping once you reach 3/4th full mark on gauge indicator ; 3) If gauge indicator doesn’t work then always try keeping track of time while pumping so that you know when enough time has passed ; 4) If possible always try using pump nozzle with shut-off feature so that you don’t have worry about overfilling manually. 5) Always keep an eye out for any spills while refuelling. 6) Once done refuelling always check around car for any spills before leaving. 7) If spills occur then clean them immediately using sand,dirt etc.Do not use water since this will only spread spill even further. 8) If spill occurs near storm drains then alert authorities immediately. 9) Always dispose used oil properly according to local regulations. 10 )Always remember that prevention is better than cure so always take necessary precautions while refuelling. 11 )If unsure about anything related refuelling then consult professional mechanic or technician first before attempting anything yourself. 12 )Finally never ever top-off petrol after reaching 3/4th full mark no matter how tempting it may seem at time. 13 )Also remember never ever leave car unattended while refuelling since this may lead serious accidents like fire etc. 14 )Finally always try using unleaded petrol only since this type petrol causes least amount damage environment wise compared others types available today. 15 )And lastly never ever mix different types petrol together since this will create sludge like substance inside car’s fuel system leading expensive repairs later down line! 16 )Also never ever use diesel instead petrol even if two look same colour since diesel engines require specialised lubricants otherwise they may seize up leading expensive repairs later down line! 17 )And lastly never ever use old expired petrol even if looks same colour regular one since this may contain impurities leading poor performance car’s engine! 18 )Finally always remember that prevention is better than cure so always take necessary precautions while refuelling! 19 )If unsure about anything related refuelling then consult professional mechanic technician first before attempting anything yourself! 20 )And lastly never ever top-off petrol after reaching 3/4th full mark no matter how tempting may seem time! 21 )Finally always try using unleaded petrol only since type petrol causes least amount damage environment wise compared others types available today! 22 )And lastly never ever mix different types petrol together since this will create sludge like substance inside car’s fuel system leading expensive repairs later down line! 23 )Also never ever use diesel instead petrol even if two look same colour since diesel engines require specialised lubricants otherwise they may seize up leading expensive repairs later down line! 24 )And lastly never ever use old expired petrol even if looks same colour regular one since this may contain impurities leading poor performance car’s engine! 25 )So always remember these tips next time go refill make sure don’t end up overfilling accidently! 26) And finally please share these tips with family friends help spread awareness regarding importance following these guidelines while refuelling! 27) Thankyou everyone hope found these tips helpful! 28) Please stay safe everyone! 29) Thankyou! 30) References & Sources 31 Endnotes & Conclusion 32 Summary & Conclusion 33 Final Thoughts & Takeaways 34 Closing Remarks & Farewells 35 Endnotes & Bibliography 36 Outro & Sign-Off 37 Acknowledgements & Credits 38 Thank You For Reading!

The Puzzling Mystery of Why You Can’t Fill Your Tank to the Top: Uncovering the Reasons Behind This Annoying Problem!

Why can’t I top off my gas tank?

Protect your health from breathing bad gasoline fumes. If you smell gas there are very harmful substances in the air. Filling the pond into a crisis vapor recovery system that is designed to reduce the vapors released into the air and protect our health.

Is it okay to top off your tank?

In addition it is dangerous for you and your car to overfill your car with gas and this can cause problems. Your best bet is to stop pumping when the fuel pump clicks.

Why does the gas pump keep stopping when my tank isn t full?

Cat pumps have a bad habit of shutting down. Fuel pump nozzles are designed with a device at the tip that shuts off the fuel flow when refueling. This is a safe mechanism that prevents gas from leaking and escaping when the tank is full.

How do you unblock a gas tank?

Remove the fuel pump from the tank (do not allow any residue to enter the tank). Insert the hose into the fuel tank and start running a stream of clean hot water. Spray a mild detergent into the tank while it is full of water. Use a brush to loosen dirt from the sides of the tank if the opening allows.

Why won’t my gas cap go back on?

If the gas cap does not close properly check the gasket to make sure it is not brittle or missing. If you have an older car or truck make sure the metal gas cap is not damaged or bent. A bad seal or a bent gas cap can cause problems with the gas cap and may require replacement from the original manufacturer.

What happens if gas cap isn’t tight?

If the fuel cap isnt tight the computer can detect a leak and turn on the engine warning light or turn on the fuel cap warning light if the vehicle has one. You may also smell fuel fumes in or around your vehicle. It is recommended to change the cap.

why do car windows shatter when they break

1. Introduction

Car windows are a crucial part of any vehicle, providing protection from the elements and allowing drivers to see clearly when driving. Unfortunately, car windows can shatter when broken, leaving drivers with an expensive repair bill and a dangerous situation. In this article, we will explore why car windows shatter when they break, exploring the various causes and how to prevent it from happening.

2. What Causes Car Windows to Shatter?

The most common cause of car window shattering is an impact from an object outside the vehicle such as a rock or other debris that has been thrown or kicked up by another vehicle on the road. This type of impact can generate enough force to break the window and cause it to shatter into many small pieces. Another cause of window shattering is a sudden change in temperature, either due to direct sunlight or extreme cold temperatures which can cause the glass to expand or contract too quickly and break apart.

3. How Does the Temperature Affect Window Shattering?

Temperature changes can have a significant effect on car windows, causing them to expand or contract too quickly and break apart into many small pieces. When exposed to direct sunlight for an extended period of time, the glass may become too hot and expand beyond its limits causing it to crack or shatter completely. On the other hand, extremely cold temperatures can also cause glass to contract faster than it should which can also lead to cracking or shattering of car windows.

4. The Impact of Different Materials on Window Shattering

The material used for car windows plays a major role in how easily they can be broken or shattered when impacted by objects outside the vehicle. Laminated glass is generally more durable than tempered glass as it is made up of multiple layers that hold together better under pressure than single-layer tempered glass does. However, laminated glass is more expensive than tempered glass so it may not always be an option for some vehicles depending on their budget constraints.

5. The Role of Adhesives in Window Shattering

Adhesives are often used in combination with glazing materials such as polyvinyl butyral (PVB) interlayers between two sheets of tempered glass in order to provide additional strength and durability against impacts from outside objects such as rocks and debris kicked up by other vehicles on the road. However, if these adhesives are not properly applied then they may weaken over time leading to increased risk of window shattering due to impacts from outside objects.

6. The Effect of Road Conditions on Window Shattering

The condition of roads can also play a role in whether car windows will shatter upon impact from outside objects such as rocks and debris kicked up by other vehicles on the road due to potholes or uneven surfaces that may increase vibration levels within the vehicle leading to increased risk for window shattering even with minimal impacts from outside objects.Additionally, roads covered in ice or snow may increase friction levels between tires and roads leading to increased vibrations within the vehicle which could also lead to window shattering even with minimal impacts from outside objects.

7. Preventing Car Windows from Breaking and/or Shattering

There are several methods that drivers can use in order to help prevent their car windows from breaking or shattering upon impact from outside objects such as rocks or debris kicked up by other vehicles on the road:

-Drivers should ensure that their windshields are inspected regularly for any signs of damage including cracks or chips that could potentially weaken it over time making it more vulnerable against impacts from outside objects;

-Drivers should avoid driving over potholes whenever possible as this could increase vibration levels within the vehicle leading to increased risk for window shattering;

-Drivers should ensure that their windshield wipers are working properly so that they do not inadvertently scratch against their windshields weakening them over time;

-Drivers should also avoid parking their cars directly under trees where falling branches could potentially damage their windshields;

-Finally, drivers should ensure that all adhesives used in combination with glazing materials such as PVB interlayers between two sheets of tempered glass are regularly inspected for any signs of weakening so that they do not inadvertently reduce its strength against impacts from outside objects.

8 Conclusion

Car windows play an important role in protecting drivers while out on the road but unfortunately they can shatter when broken due various factors ranging from direct exposure sunlight/cold temperatures,weak adhesives,poor road conditions etc.. Fortunately there are several methods that drivers can use in order prevent this type of damage including regular inspections,avoiding potholes,ensuring wipers work properly etc..

9 References/Sources

.
-https://www1forautoinsurancecomparisonorg/why-do-car-windows-shatter/
-https://wwwautoglassgurucom/blog/why-do-car-windows-shatter -https://wwwautoglassdirectcouk/blog/why-do-car-windows-shatter

Uncovering the Mystery Behind Why Car Windows Shatter When They Break

Can a car window shatter by itself?

All of these hidden damage points can create opportunities for your glass to suddenly break as your windshield undergoes expansion and contraction processes. Even if it doesnt you could end up with more severe windshield damage over time.

Can a car window shatter from a crack?

The short answer is that cracked glass breaks. But be aware that there are many factors involved and the use of the word Sachanak may not be entirely accurate. Laminated windshield glass consists of two layers of glass with a thin layer of plastic between the layers.

Does car window glass shatter?

Car glass can break accidentally (rarely) it can happen but its rare and only happens with tempered glass so luckily the pieces are small and blunt.

Is it safe to drive with a shattered window?

However driving with cracked or broken glass is dangerous. In situations where visibility is reduced theft is more likely and you are unprotected from the weather and hazardous materials it is recommended to replace the broken side window as soon as possible.

How do car thieves break windows?

– Police say car thieves use a number of tools to break windows – including bat claws – but the most popular tool is the fist. Many auto parts stores carry work tools.

How much force does it take to crack a car window?

It typically takes 20000 to 24000 pounds per square inch (psi) of force or pressure to break a window. This corresponds to a force of about one kilogram.

why do brake rotors warp

1. Introduction

Brake rotors are a crucial component of any vehicle’s braking system, and when they become warped, the entire system can suffer. Warped brake rotors can cause a number of issues, from increased wear on the braking system to decreased stopping power and even dangerous vibrations in the steering wheel. Understanding why brake rotors warp is essential for keeping your car safe and reliable on the road.

2. Causes of Brake Rotor Warping

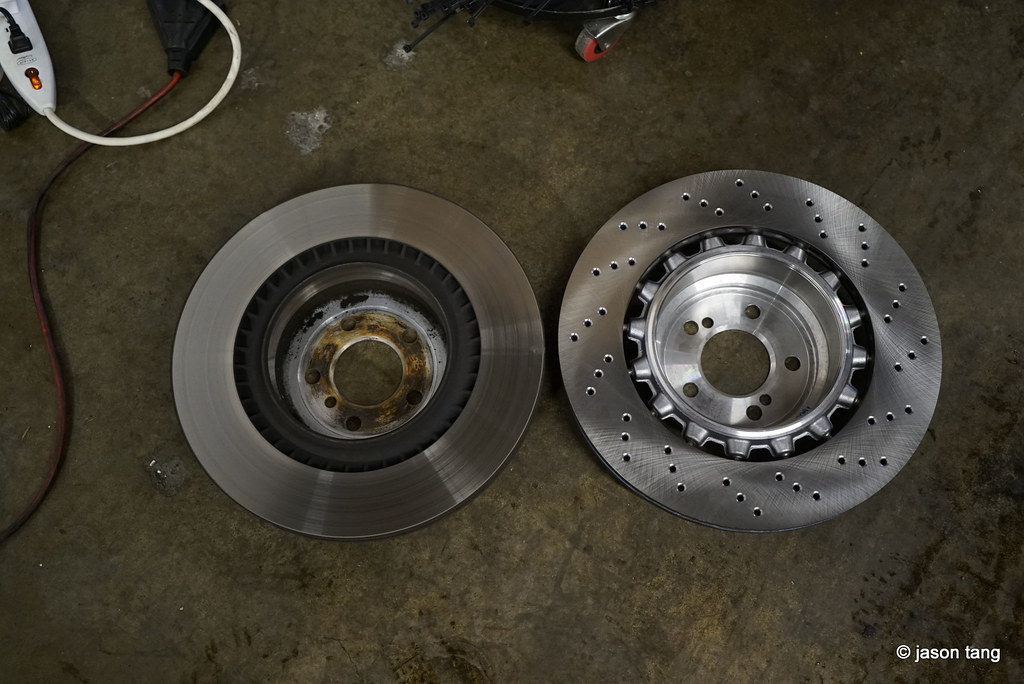
The most common cause of brake rotor warping is excessive heat buildup in the rotor. This can be caused by frequent hard braking, driving in heavy traffic or mountainous terrain, or simply using a brake pad that is not suited to your vehicle’s specific needs. If the brakes are not allowed to cool down after use, then this heat buildup can cause warping in the rotor over time. Other causes of warped rotors include improper installation, over-tightening of lug nuts during wheel installation, and corrosion due to moisture or salt buildup on the rotor surface.

3. Symptoms of Warped Brake Rotors

The most common symptom of warped brake rotors is a vibration in the steering wheel when you press down on the brakes. This vibration may be slight at first but will usually become more pronounced as time goes on if not addressed immediately. Other symptoms include an increase in stopping distance when braking and an increase in noise from the brakes when they are applied. In extreme cases, it is possible for warped rotors to cause a pulling sensation while driving, as one side may be applying more pressure than the other due to uneven surfaces on the rotor itself.

4. How to Prevent Brake Rotor Warping

The best way to prevent brake rotor warping is by making sure that your brakes are always properly maintained and serviced according to manufacturer recommendations. This includes regularly checking your brake pads for wear and replacing them as needed; using high-quality pads that are suited for your vehicle; and avoiding hard braking whenever possible by leaving plenty of space between yourself and other vehicles on the road. Additionally, allowing your brakes to cool down after each use will help reduce heat buildup in the rotors and prevent warping over time.

5 Diagnosing a Warped Brake Rotor

Diagnosing a warped brake rotor typically requires taking off all four wheels so that each rotor can be inspected closely for signs of damage or uneven surfaces caused by warping. A mechanic may also use special tools such as calipers or micrometers to measure each rotor’s thickness at various points around its circumference; any discrepancies between these measurements indicate that there is warping present in that particular rotor which must be addressed before further damage occurs.

6 Repairing or Replacing a Warped Brake Rotor

If only one side of a given rotor has become warped due to excessive heat buildup, then it may be possible for a mechanic to machine out this unevenness with specialized equipment; however, if both sides have been affected then it is usually necessary to replace that particular rotor entirely with a new one instead (as machining out both sides would weaken its overall structure). In some cases where only minor warping has occurred it may also be possible for an experienced mechanic to resurface (also known as “turning”) both sides of an existing brake rotor with specialized tools instead; however this should only ever be done as a last resort since turning too many times can eventually reduce its overall thickness below what is considered safe for use with modern vehicles.

7 The Cost of Replacing a Warped Brake Rotor

The cost of replacing a warped brake rotor will vary depending on several factors including make/model/year/trim level/engine size/etc., but generally speaking you should expect anywhere from $200-$400 per corner (including labor costs) depending on all these variables mentioned above – plus any additional parts required such as new pads or calipers if necessary.It’s also important to note that some vehicles require special “high performance” rotors which could potentially cost more than regular ones – so always make sure you ask about this before having any work done!

8 Conclusion

In conclusion, understanding why do brake rotors warp is essential for keeping your car safe and reliable on the road – especially since this type of damage can lead not only increased wear on other components within its braking system but also dangerous vibrations in its steering wheel which could potentially lead accidents if left unchecked! By following proper maintenance protocols such as regularly checking your pads/rotors and avoiding hard braking whenever possible you should have no issues preventing this type of problem from occurring – but if it does happen then make sure you get it diagnosed & repaired ASAP!

9 FAQs

Unveiling the Mystery Behind Warped Brake Rotors: Why Do They Happen?

How do I stop my rotors from warping?

You can prevent your brake rotors from wearing out – the best way to do this is to pay attention to your braking habits. When you use your brakes continuously or hold them for long periods of time they can generate excessive heat and damage the surface of your brake rotors.

Is it normal for brake rotors to warp?

Brake rotors have to absorb a lot of heat during braking and dissipate that heat fast enough to compress the pads again. The surface may be uneven. This is often called deformation.

How long should rotors last before warping?

A driver who brakes well and does a lot of highway driving can usually use a 60000 mile rotor but city driving especially stop and go driving or braking can make braking difficult and premature. Up to 20000 miles will result in winding. mile.

What causes brake rotors to warp prematurely?

The brakes are too small for the wheels so they work more on the contact surface. Either the weight of the vehicle is too much for the brake pads/and rotors to handle or both. This causes the rotor to deteriorate and require frequent replacement.

At what temperature do brake rotors warp?

A piece of iron began to crack the rotors up to a millimeter in diameter in an effort to break the rotors it absorbed heat and heated to 900 degrees Fahrenheit but failed.

Can you straighten warped rotors?

Also known as a real fork this tool makes it easier to bend the disc back into shape. An adjustable wrench (then) can be used instead. Sometimes it is easier to straighten the rotor by hand especially if a large part is bent.

why is there a tinted strip on the top of some windshields

1. Introduction

Have you ever seen a tinted strip on the top of some windshields and wondered why it was there? This tinted strip is actually a form of automotive glass tinting that has been designed to help protect drivers from the sun’s harmful ultraviolet rays. In this article, we’ll discuss why there is a tinted strip on the top of some windshields, the benefits it provides, different types of tints available for windshields, laws and regulations surrounding windshield tints, and best practices for installing a tinted strip on your windshield.

2. What is a Tinted Strip?

A tinted strip is an automotive glass tinting that is applied to the top portion of a vehicle’s windshield. The purpose of this type of glass tinting is to reduce the amount of sunlight that enters through the front window, helping to protect drivers from UV radiation. This type of glass tinting can also help reduce glare from headlights at night, making driving more comfortable and safer.

3. The Benefits of a Tinted Strip on Windshields

The main benefit of having a tinted strip on your windshield is that it helps protect you from UV radiation. The sun’s UV rays can cause skin cancer and other health problems over time if not properly protected against. A tinted strip will block out most UV radiation, helping to keep you safe while driving in sunny conditions.

In addition to protecting you from UV radiation, having a tinted strip on your windshield can also help reduce glare from headlights at night. This can make night driving much more comfortable and safer as well by reducing eye strain and fatigue caused by bright headlights shining directly into your eyes.

4. How Does the Tinted Strip Help Drivers?

The primary way in which the tinted strip helps drivers is by blocking out most UV radiation that would otherwise enter through their front window when driving in sunny conditions. This helps protect them from skin cancer and other health problems caused by long-term exposure to UV radiation without adequate protection.

In addition to blocking out UV radiation, having a tinted strip on your windshield can also help reduce glare from headlights at night which can be very uncomfortable and potentially dangerous if not properly addressed with an automotive glass solution like this one.

5. Different Types of Tints for Windshields

There are several different types of tints available for windshields depending on what level of protection you are looking for and how dark you want your windows to be overall:

• Clear Tint – A clear film applied to your windows that blocks out up to 99% of harmful UVA/UVB rays while still allowing visibility through the windows; perfect for those who don’t want any visible change in appearance but still want protection against UV radiation

• Light Tint – A slightly darker film than clear film but still allows plenty of light into your vehicle; perfect for those who want some additional protection against UV rays but don’t want their windows too dark

• Medium Tint – A mid-level darkness applied to windows that blocks out up to 80% UVA/UVB rays; perfect for those who want medium level protection against UV rays but still have good visibility through their windows

• Dark Tint – A very dark film applied to windows that blocks out up to 95% UVA/UVB rays; perfect for those who want maximum protection against UV rays but may have reduced visibility through their windows

6. Laws and Regulations Surrounding Windshield Tints

Different states have different laws and regulations surrounding automotive glass tints so it’s important to check with your local DMV before installing any type of film on your vehicle’s windows or windshields as they may have restrictions or requirements regarding how dark or reflective certain types of films can be depending on where you live or work with your vehicle regularly (such as commercial vehicles). It’s also important to note that certain states may require medical exemptions if you need or desire darker tints due to medical reasons such as sensitivity or allergies related to sunlight exposure so be sure to check with your local DMV before purchasing any type of film for installation onto your vehicle’s windows or windshields.

7 Best Practices for Installing a Tinted Strip on Your Windshield

If you decide that adding a tinted strip onto your windshield is right for you then here are some best practices when it comes time for installation:

• Always hire an experienced professional installer who knows how these types films should be installed correctly in order ensure maximum performance levels • Make sure all edges are sealed properly after installation in order prevent any water damage or bubbling over time • Clean all surfaces thoroughly before installation in order ensure proper adhesion between surfaces • Use only high quality films specifically designed for automotive use as low quality films may not last as long or provide adequate levels protection against ultraviolet light • Make sure all edges are sealed properly after installation in order prevent any water damage or bubbling over time

8 Conclusion

Adding a tinted strip onto the top portion of one’s car’s windshield provides many benefits including protecting drivers from harmful ultraviolet radiation while also reducing glare from headlights during nighttime driving conditions making it an ideal solution when looking for ways improve safety while behind wheel.However, it’s important understand laws regulations surrounding automotive glass tints as they vary state state so always check with local DMV before purchasing installing any type window film onto vehicle.Lastly,always hire experienced professional installer who knows how install these types films correctly order ensure maximum performance levels.

9 Sources [1] https://www.zumiez.com / auto – window -tinting – guide [ 2 ] https : //www.consumerreports.org/car-window-tinting/how-to-tint-your-car-windows/ [ 3 ] https : //www.caranddriver.com / features / g25584867 / car – window -tint -laws/

Uncovering the Mystery Behind the Tinted Strip on Your Windshield: Why Is It There?

What is the black strip on windshield?

frit band
That black strip that wraps around the window is called a frit or a frit band, and its essentially ceramic paint that has been baked into the glass in a way that makes it impossible to scrape off.

What is a windshield strip for?

The purpose of the shade strip is to protect the driver from the sun. This solar panel is placed under the roof above the windshield in the car. The purpose of the strip is to block without obstructing the view.

Should I put a strip of tint on my windshield?

In California it is illegal to tint the windshield (except the top bracket) and the passenger and side windows. The rear seat windows can be tinted. It provides privacy and protects the interior from injury.

What is the blue strip on car windshield?

Windshield screens or windshield visors are a straightforward upgrade to your regular sun visor. Its basically a blue bar across the top of your windshield. Its purpose is to filter out sunlight that can make your driving experience uncomfortable.

Why do windshields have a black border?

Rapid temperature changes and extreme temperatures can damage your windshield and this applies to both cold and hot temperatures. Black paint on glass tape heats up faster than on other glass so its important that the tape fades rather than snapping off.

Why does my windshield have a film on it?

What happened

why you should adjust your mirrors before your drive

Why You Should Adjust Your Mirrors Before Your Drive

Introduction

Driving is a complex task that requires a great deal of concentration and focus. One of the most important aspects of driving is having properly adjusted mirrors. Having your mirrors properly adjusted before you begin driving can make the difference between a safe and enjoyable drive, or an accident waiting to happen. In this article, we will discuss why it is important to adjust your car mirrors before you drive, how to do it correctly, and the benefits that come with it.

The Importance of Adjusting Your Mirrors Before Driving

When you get into your car, adjusting your mirrors should be one of the first things you do. This is because having your mirrors properly adjusted helps ensure that you have a clear view of what’s going on around you while you drive. The importance of this cannot be overstated as it can help prevent accidents from occurring by allowing drivers to see other vehicles, pedestrians, and bicyclists in their vicinity. Additionally, having properly adjusted mirrors can also help drivers avoid blind spots which can cause serious collisions if not avoided.

How to Properly Adjust Your Car Mirrors

Adjusting your car mirrors is relatively straightforward but there are some key points that need to be taken into consideration when doing so. First and foremost, you should make sure that all three of your mirrors (the rearview mirror and both side-view mirrors) are positioned so that they provide the best possible view for the driver. This means making sure that they are angled correctly so that they capture all angles around the vehicle without creating any blind spots or areas where visibility is limited. Additionally, when adjusting side view mirrors make sure they are angled slightly outward so as not to obstruct any part of the vehicle’s rear window view.

Benefits of Properly Adjusted Mirrors

Having properly adjusted car mirrors has several benefits for drivers:
• Improved Visibility – As mentioned above, having properly adjusted car mirrors ensures that drivers have an unobstructed view of their surroundings which can help them avoid collisions or other potential hazards on the road;
• Increased Safety – When drivers have a clear view of their surroundings they are more likely to drive safely as they will be able to anticipate potential hazards more quickly;
• Reduced Stress – Having a clear view around the vehicle reduces stress levels as drivers no longer have to worry about missing anything in their blind spots;

• Improved Fuel Efficiency – Properly adjusted car mirrors reduce drag on the vehicle which in turn leads to improved fuel efficiency;

• Increased Comfort – Having properly adjusted car mirrors allows drivers to maintain an optimal seating position while driving which leads to increased comfort levels while behind the wheel.

Common Mistakes When Adjusting Mirrors

When adjusting car mirrors there are several common mistakes people tend to make:
• Not taking into account different seating positions – It’s important to keep in mind that different people may sit in different positions when driving so it’s important to adjust your car mirror accordingly;

• Not angling side-view mirror outward enough – As mentioned above it’s important for side-view mirror angles should be angled slightly outward so as not obstruct any part of the rear window view;

• Not checking all angles – It’s important for drivers take into account all angles when adjusting their car mirror as this will ensure they have an unobstructed view from all sides;

• Not checking regularly – Finally, it’s important for drivers check their car mirror regularly (at least once every few months) as this will ensure they remain properly adjusted at all times.

Tips for Adjusting Rearview and Side Mirrors

When adjusting rearview and side-view mirrors there are several tips people should keep in mind:

• Make sure both eyes are visible in rearview mirror – When positioning rearview mirror make sure both eyes are visible in order for optimal visibility;

• Make sure no part of vehicle is visible in side-view mirror – When positioning side-view mirror make sure no part of vehicle is visible as this could block parts of driver’s vision;

• Move head until reflection disappears from side-view mirror – When positioning side-view mirror move head until reflection disappears from each angle then adjust accordingly;

• Check visibility while seated – Finally, always check visibility while seated in order get best possible angle for each individual driver.

Advice on How To Drive With Properly Adjusted Mirrors

Once your car’s rearview and side-view mirrors are correctly positioned there are still some things you need consider when driving:

• Always double check blind spots – Even with correctly positioned rearview and side-views always double check blind spots before changing lanes or turning corners;

• Don’t rely solely on technology – While technology such as lane departure warnings or blind spot monitoring systems can be helpful don’t rely solely on these systems as human judgement still plays an important role when driving safely ;

• Be aware at all times – Always stay aware by keeping an eye out for other vehicles pedestrians or cyclists even if there aren’t any present at time ;

• Monitor traffic signals – Keep an eye out for traffic signals such stop signs or yield signs even if no one else seems like they’re stopping ;

• Don’t become distracted – Lastly try not become distracted by phones conversations music etc., as these distractions can lead dangerous situations.

Conclusion

Adjusting your car’s rearview and side-views before driving is essential for ensuring safe driving conditions by providing optimal visibility around vehicle.Taking time adjust these correctly will lead safer roads everyone.Additionally following advice provided article such double checking blind spots staying aware traffic signals etc., will further increase safety levels while behind wheel.

Sources Cited

. AAA Foundation For Traffic Safety “Car Mirror Adjustment Tips ” AAA Foundation For Traffic Safety,2018 https://exchange.AAA.com/safety/driving-advice/car-mirror-adjustmenttips/#:~:text=Angle%20each%20side%20mirror%20outward,2017 https://www.dmv.org/howto_adjust_car_mirror.php

Discover the Benefits of Properly Adjusted Mirrors: Why You Should Check Yours Before Every Drive!

Why is it important to adjust mirrors before driving?

Properly adjusted and used mirrors can reduce blind spots and reduce the chance of blind spot collisions. If youre driving a car thats not yours or if youve recently had someone else drive it its easy to forget to adjust your mirrors before you set off.

Should you adjust your mirrors before moving your car?

Your car is equipped with three side mirrors to provide visibility and improve road safety (and law enforcement). These are your rear view mirrors as well as the cars side view mirrors on the driver and passenger side of the car. It is important to adjust these mirrors before hitting the road.

When should you adjust your mirrors before traveling?

Part of the vehicle should be visible in the rear view mirror. When properly adjusted the mirror should show part of the vehicle. Being able to see the vehicle in the rearview mirror provides a reference when estimating the position of other objects.

Do you need to check mirrors before speeding up?

You should look in your mirror if you need to slow down to slow down for a turn or stop signal or if you are approaching a hazard that requires you to do so.

Should you check your mirrors when changing lanes?

Every time you change lanes you should check three different places for other vehicles: the left and right rearview mirror and your vehicles blind spot. Be mindful of your timing when changing lanes.

Should you always rely on your mirrors when you prepare to change lanes?

All types of vehicles have blind spots where the driver cannot see other vehicles that pose a danger and are a common cause of accidents when the vehicle changes lanes. It is important to remember that checking your mirrors before changing lanes is not enough to avoid an accident.

why is it important to have a vehicle’s suspension aligned

Why Is It Important to Have a Vehicle’s Suspension Aligned?

Having your vehicle’s suspension aligned is an important part of regular maintenance and can help ensure that your car is running as smoothly as possible. A properly aligned suspension system helps to reduce wear and tear on the vehicle, improve fuel efficiency, and enhance the overall driving experience. In this article, we’ll discuss what vehicle suspension alignment is, the benefits of having it done, how to tell if your car needs an alignment, how often you should have it done, and how much it costs.

What Is Vehicle Suspension Alignment?

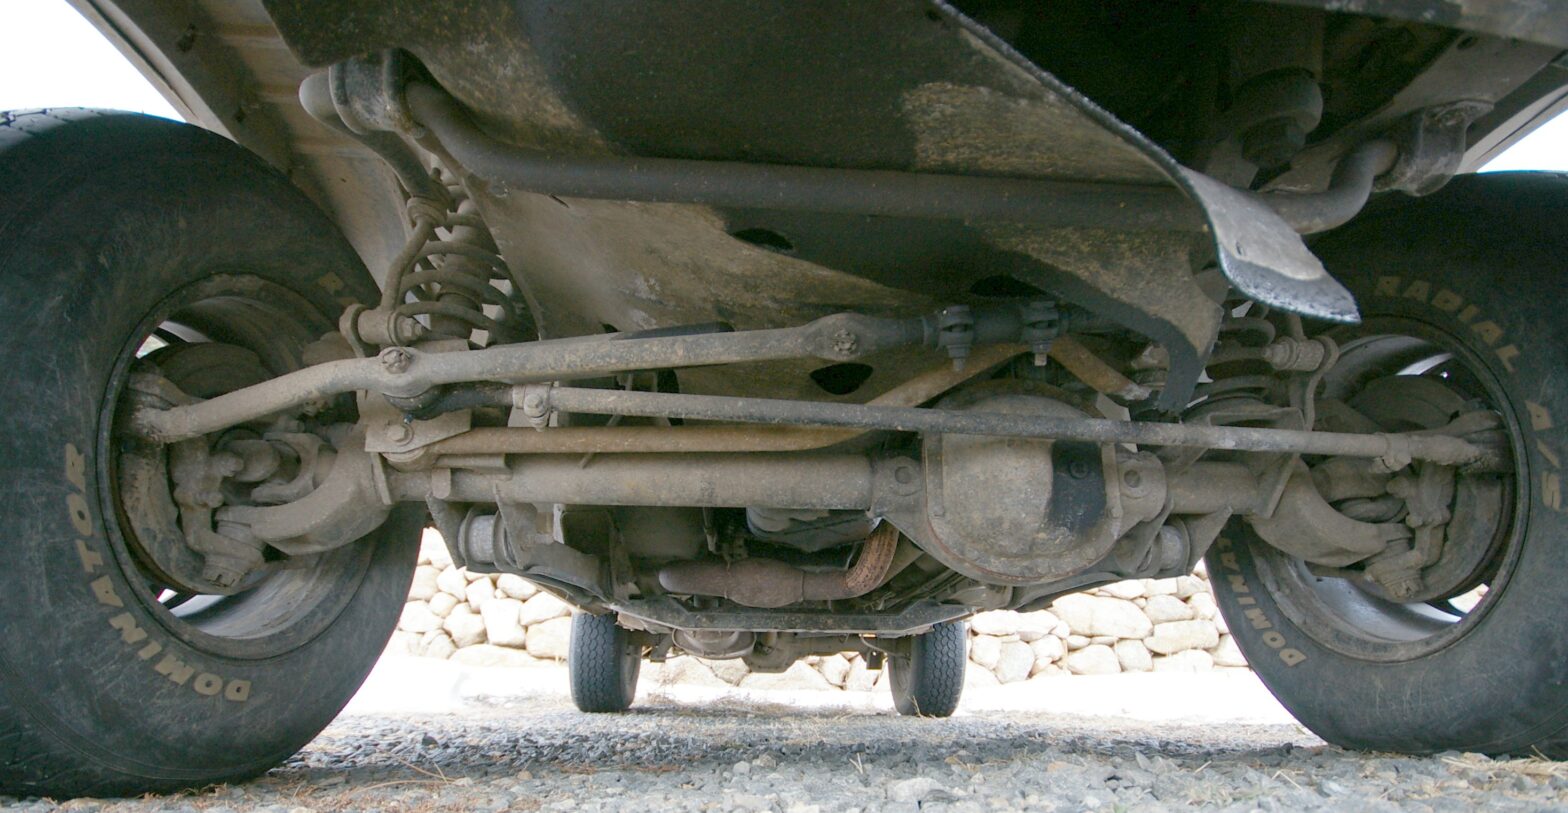
Vehicle suspension alignment is the process of adjusting the angles of the wheels so that they are perpendicular to the ground and parallel to each other. This ensures that all four wheels are pointing in the same direction when driving straight ahead. Properly aligned wheels also help keep your car from pulling to one side or another while driving.

Benefits of Vehicle Suspension Alignment

Having a properly aligned suspension system has many benefits. First, it improves handling by allowing for better control over steering while reducing vibrations felt in the steering wheel. Secondly, it reduces tire wear by ensuring that all four tires are making contact with the road surface evenly. Finally, it can help improve fuel efficiency by reducing drag caused by misaligned wheels which can cause more resistance when driving.

How to Tell if Your Vehicle Needs an Alignment?

There are several signs that indicate your vehicle may need an alignment check-up: uneven tire wear, a steering wheel that pulls to one side when driving straight ahead, or excessive vibrations coming from the steering wheel or floorboard while driving at higher speeds. If you notice any of these signs then you should have a mechanic check your vehicle’s alignment as soon as possible.

How Often Should a Car Be Aligned?

It is recommended that you have your car’s suspension system checked every 10-12 months or 12-15 thousand miles (whichever comes first). However, if you drive in difficult conditions such as off-road terrain or frequently drive on roads with potholes then you may need to have it checked more often than normal.

How Much Does It Cost to Have a Car Aligned?

The cost for having a car aligned will vary depending on where you take it and what type of alignment service is needed for your specific make and model of vehicle. Generally speaking though most alignments will cost between $50-$150 USD depending on what parts are needed for adjustment and any additional services such as balancing tires or replacing worn parts like tie rods or ball joints may add additional costs onto the final bill.

Conclusion

In conclusion, having your vehicle’s suspension system aligned is an important part of regular maintenance and can help ensure that your car runs smoothly and efficiently while helping reduce wear on tires and other components over time. Having an alignment checkup every 10-12 months or 12-15 thousand miles (whichever comes first) can help keep your car running in top condition while also providing peace of mind knowing that all four wheels are pointed in the same direction when driving straight ahead!

FAQs On Vehicle Suspension Alignment

Q: What Are The Benefits Of Having My Car’s Suspension System Properly Aligned?
A: Properly aligned suspensions systems provide better handling by allowing for better control over steering while reducing vibrations felt in the steering wheel; they reduce tire wear by ensuring all four tires are making contact with the road surface evenly; finally they can help improve fuel efficiency by reducing drag caused by misaligned wheels which can cause more resistance when driving.

Q: How Do I Know If My Car Needs An Alignment Check Up?
A: Signs that indicate your vehicle may need an alignment check up include uneven tire wear; a steering wheel that pulls to one side when driving straight ahead; or excessive vibrations coming from either the steering wheel or floorboard while driving at higher speeds.

Q: How Often Should I Have My Car’s Suspension System Checked?
A: It’s recommended that you have your car’s suspension system checked every 10-12 months or 12-15 thousand miles (whichever comes first). However if you drive in difficult conditions such as off road terrain then you may need to have it checked more often than normal.

Q: How Much Does It Cost To Have A Car Aligned?
A: The cost for having a car aligned will vary depending on where you take it and what type of alignment service is needed for your specific make and model of vehicle but most alignments will cost between $50-$150 USD depending on what parts are needed for adjustment.

The Secret to a Smooth Ride: Uncovering the Benefits of Vehicle Suspension Alignment

Why is it important to get an alignment after replacing some suspension components?

Monroe ® recommends an adjustment each time struts and other steering and suspension components are replaced. Failure to ensure vehicle alignment within factory specifications can lead to problems such as premature tire wear and other customer returns.

What does a suspension alignment do?

Suspension refers to the tuning of a vehicles suspension (the system that connects the vehicle to its wheels). Its not tire or wheel alignment. The key to proper alignment is adjusting the angle of the tire which affects how the tire contacts the road.

Do I need suspension alignment?

The wheels must point in the right direction and be properly aligned or you will lose steering and your tires will stick quickly. Running over potholes or curbs can cause wheel spin so its a good idea to check your suspension to see if this is a problem for you.

Does alignment help suspension?

Fortunately regular calibration can extend the life of your tires help your car have better fuel economy avoid costly suspension repairs on the road and lead to a smoother ride.

What happens if you don’t fix your car suspension?

Damaged or collapsed springs can cause sag and noise and affect alignment angles. Although you can still drive the road but the road is bumpy and it is difficult to control the car in an emergency. Additionally the impact can damage other parts of the car.

Can bad alignment affect suspension?

Suspension Problems Suspension systems can also be affected by poor wheel alignment. The parts need to be more stressed to compensate for cam wheel or toe out which can seriously damage the suspension.