1. Introduction
Bleeding your brakes is an important part of regular car maintenance, and it’s a process that can help keep your car running smoothly and safely. The process of bleeding your brakes involves removing air from the brake lines in order to ensure that the brakes are working properly and efficiently. In this article, we will discuss what it means to bleed your brakes, why you need to do it, the steps involved in the process, different types of brake bleeding methods, safety precautions when bleeding your brakes, common problems with the process and troubleshooting tips for successful brake bleeding.
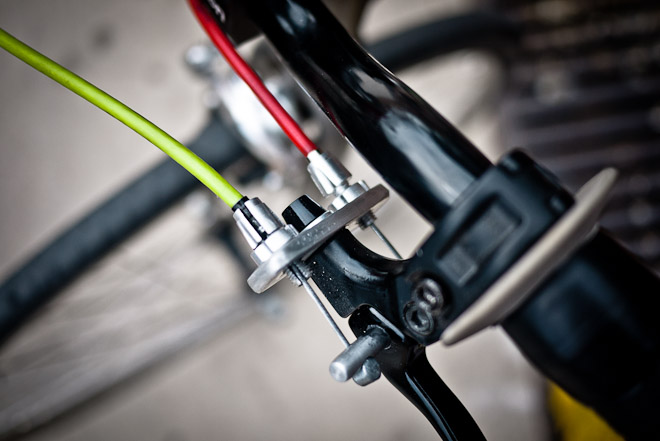
2. What Are Brake Bleeding?
Brake bleeding is a process that is used to remove air from the brake lines so that they can work properly and efficiently. This is done by using a special tool called a bleeder screw which is attached to each wheel cylinder or caliper on the vehicle’s braking system. The bleeder screw allows air bubbles to escape from the brake line while new fluid is added at the same time. This ensures that there remains no air in the brake line which can cause issues such as spongy or soft brakes.
3. Why Do You Need to Bleed Your Brakes?
It’s important to bleed your brakes regularly because air bubbles can become trapped in the brake lines due to normal wear and tear over time or even due to improper installation of parts such as calipers or wheel cylinders. Air bubbles can cause problems with braking performance such as spongy or soft brakes which could lead to dangerous situations on the road. Therefore, it’s important to make sure that all air bubbles are removed from the brake lines by regularly bleeding them with a special tool designed for this purpose.
4. The Steps to Bleed Your Brakes
The steps for successfully bleeding your brakes involve firstly making sure you have all of the necessary tools and equipment available such as a bleeder screw driver, some old rags or towels, fresh DOT 3/4 fluid (or whatever type of fluid specified by your car manufacturer) and a container for catching any spilled fluid during the process. Once you have all of these items ready then you can begin:
• Start by raising up one side of your vehicle so that you have access to one wheel at a time;
• Loosen up one bleeder screw located on each wheel cylinder or caliper;
• Attach a length of hose onto each bleeder screw;
• Place an old rag underneath each hose in order catch any spilled fluid;
• Have someone pump up their foot pedal several times while also keeping pressure on it;
• When they release their foot pedal then open up one bleeder screw at a time until fresh fluid starts coming out;
• Close up each bleeder screw once fresh fluid starts coming out;
• Repeat steps 4-7 until all four wheels have been bled;
• Check for any leaks before lowering down your vehicle again;
• Top off any low levels with fresh DOT 3/4 fluid (or whatever type specified by manufacturer).
5. Different Types of Brake Bleeding Methods
There are several different types of methods available when it comes to bleeding your brakes including manual methods such as gravity bleeding (which involves allowing gravity itself pull out old fluid from each wheel cylinder) or vacuum assisted methods (which involve using a special tool connected between each wheel cylinder and an external vacuum source). There are also more advanced methods available such as power-bleeding which uses pressurized tanks filled with fresh DOT 3/4 fluid (or whatever type specified by manufacturer) connected directly into each wheel cylinder in order speed up the entire process significantly compared against other manual methods mentioned above.
6. Safety Precautions When Bleeding Your Brakes
It’s important take certain safety precautions when performing this task such as wearing protective gloves and eye protection when handling any fluids involved in this process as well ensuring that no sparks are present near any open containers filled with flammable liquids like gasoline or diesel fuel etc… It’s also important not mix together different types of fluids so always check what type of DOT 3/4 fluid (or whatever type specified by manufacturer) is required before starting this job – never use tap water! Finally, always make sure that all tools used during this job are clean before starting and afterwards too!
7. Common Problems With the Process of Bleeding Your Brakes
Common problems experienced during this job include not having enough pressure when pumping up foot pedals due incorrect installation / adjustment of master cylinders & reservoirs – if unsure then seek professional help! Another problem encountered could be insufficient amounts of new DOT 3/4 fluid (or whatever type specified by manufacturer) added during refilling – always make sure there’s enough before starting! Finally, not tightening up bleeder screws properly after finishing can also lead problems – always double check these!
8 Troubleshooting Tips For The Process Of Bleeding Your Brakes
Here are some useful troubleshooting tips if you experience any issues whilst carrying out this job:
1) Check master cylinders & reservoirs for correct installation / adjustment if experiencing low pressure when pumping foot pedals;
2) Make sure there’s enough new DOT 3/4 fluid (or whatever type specified by manufacturer) added before starting & top off afterwards if necessary;
3) Always double check that all bleeder screws have been tightened correctly after finishing;
4) If unsure then seek professional help!
9 Conclusion
Bleeding your brakes is an important part of regular car maintenance which helps keep them running safely & effectively over time – understanding what it means & how it works will help ensure successful results every time!
Unlock the Power of Brake Bleeding: Discover What It Means to Take Control of Your Ride!
What happens when you bleed brakes?
Brake bleed is a common procedure for bleeding air from a vehicles hydraulic brake system. This process involves opening a valve to allow air (and some brake fluid) to escape from the pressure.
What happens if I don’t bleed my brakes?
If the brakes do not bleed and air bubbles are trapped in the brake fluid the hydraulic pressure is greatly reduced making the brakes less effective. You may also have a broken pedal spongy condition.
Why do you need to bleed brakes?
All hydraulic brakes are bled or cleaned for one of two reasons: to remove air bubbles from the brake system or to bleed air from the brake system. Replace with new brake fluid.
Can I bleed brakes by myself?
Just add new fluid to the master cylinder reservoir. Next loosen the brake caliper/cylinder bleed screw from the farthest (usually right rear) wheel. Go inside and play on your phone for at least an hour. Close the bleed screw and prime the master cylinder.
How long does it take to bleed brakes?
between 30 and 40 minutes
How Long Does It Take to Bleed Brakes? Overall, it will take you anywhere between 30 and 40 minutes to bleed the brakes of your car, thats around 10 to 15 minutes on each wheel. Youll need to ask someone to assist you in the process, as its their responsibility to press the brake pedal as youre bleeding the brakes.
How often should I bleed my brakes?
every two to three years
To get straight to the point, automotive service experts recommend having your car brakes bled every two to three years. You can choose to have a licensed mechanic perform the service along with your scheduled brake services, or you can try to do it yourself.