what are leaf springs

1. What are Leaf Springs?

Leaf springs are a type of suspension system that can be found in many vehicles, from cars and trucks to trailers and buses. They are long, thin pieces of metal that are connected together in an arched shape, with one end attached to the body of the vehicle and the other end connected to the axle or wheel hub. The flexibility of the leaf spring allows it to absorb bumps and vibrations from the road, providing a smoother ride for passengers.

2. History of Leaf Springs

Leaf springs have been around since ancient times, with evidence showing they were used in chariots dating back to 600 BC. By the 19th century, they had become a popular choice for horse-drawn carriages due to their ability to provide a comfortable ride on bumpy roads. In the 20th century, leaf springs were adopted by automobile manufacturers as well, becoming an essential part of most modern vehicles’ suspension systems.

3. Types of Leaf Springs

There are two main types of leaf springs: mono-leaf and multi-leaf. Mono-leaf springs consist of one long piece of metal that is curved into an arch shape, while multi-leaf springs have several layers of metal stacked on top of each other for extra strength and flexibility. Mono-leaf springs are usually used in lighter vehicles such as cars, while multi-leaf springs are better suited for heavier vehicles such as trucks and buses.

4. Advantages and Disadvantages of Leaf Springs

One advantage of leaf springs is their simplicity – they require minimal maintenance compared to other suspension systems such as coilovers or airbags. They also provide good stability when cornering at high speeds due to their stiffness and rigidity when compressed under load. However, leaf springs can be prone to sagging over time due to wear and tear which can affect handling performance negatively. Additionally, because they’re made from metal, they tend to be heavier than other suspension systems which can reduce fuel efficiency in some cases.

5 Design Considerations for Leaf Springs

When designing leaf spring suspensions for vehicles, engineers must consider factors such as weight distribution, ride quality, road conditions and vehicle usage (such as off-roading). For example, if you’re designing a suspension system for a truck that will be used off-road frequently then you may need to use multi-leaf springs instead of mono-leafs due to their increased durability under load. Additionally, you must ensure that the spring rate (or stiffness) is appropriate for your application – too soft and your vehicle will bounce excessively; too stiff and it won’t handle bumps well at all!

6 Uses Of Leaf Springs In Automobiles

Leaf springs are commonly used in automobiles because they provide good stability when cornering at high speeds due to their stiffness when compressed under load – this makes them ideal for performance applications such as sports cars or muscle cars where handling is critical. Additionally,they are often used on off-road vehicles because their robustness allows them cope with rough terrain better than other suspension systems.Finally,they also provide good ride comfort when travelling on bumpy roads which makes them suitable for passenger cars too.

7 Benefits Of Using Leaf Springs In Automobiles

Using leaf springs in automobiles has several benefits including improved stability during cornering; increased durability over rough terrain; reduced wear & tear on components; improved ride comfort; increased safety; lower cost than other suspension systems; less maintenance required; increased fuel efficiency ;and finally,they offer good ground clearance which is important when travelling off road.

8 Maintenance Tips For Leaf Spring Suspension Systems

To ensure your leaf spring suspension system performs optimally over time,it’s important that you carry out regular maintenance checks.Firstly,check all mounting points regularly & replace any worn or damaged parts immediately.Secondly,check all bolts & nuts regularly & tighten any loose ones.Thirdly,ensure all moving parts (such as shackles & U bolts) are lubricated regularly.Fourthly,check all bushings regularly & replace any worn ones immediately.Finally,ensure all leaves remain flat & not twisted or warped otherwise this may affect performance adversely.

9 Conclusion

>
Leaf spring suspensions have been around since ancient times but still remain popular today due to their simplicity & effectiveness when it comes providing stability during cornering ;increased durability over rough terrain ;reduced wear & tear on components ;improved ride comfort ;increased safety ;lower cost than other suspension systems ;less maintenance required ;increased fuel efficiency ;and finally good ground clearance which is important when travelling off road.With regular maintenance checks however these benefits can be maximised ensuring your vehicle’s performance remains optimal over time.

Discover the Power of Leaf Springs: Unleash Your Vehicle’s Potential!

What is the purpose of a leaf spring?

The main function of leaf springs is to provide passenger comfort by dampening vertical vibrations caused by uneven road surfaces. Studies have shown that a desirable leaf spring material should have high strength and low modulus in the longitudinal direction [127].

Why do trucks use leaf springs?

Leaf springs are the oldest type of automotive spring. It is used in solid axle suspension and is currently only produced for the rear axle of vans and commercial vehicles. Leaf springs hold the axle and suspend the weight of the vehicle meaning control arms are not required.

Can you drive without leaf springs?

Is it possible to drive a car with a broken leaf spring? Technically you can drive a truck with broken leaf springs but that doesnt mean you should. You can drive the truck preferably a short distance where the problem can be solved.

Are leaf springs better than coil?

The leaves are stronger than the spirals. They can handle higher loads with less deflection and are easier to lift or lift than hanging from leaf springs.

How much does it cost to replace leaf springs on a truck?

$69.99 to $149.99
Depending on the make and model of the truck and the number of leaves on a spring, a single leaf spring will generally cost anywhere from $69.99 to $149.99. Therefore, at the lower-priced end of the spectrum, a new pair of leaf springs could cost you roughly $139.98.

How long do leaf springs last?

about 200,000 miles
In an older, heavily driven automobile, the leaf springs may not last as long. In contrast, a well-maintained vehicles leaf springs can last well over 100,000 miles. On average, a set of leaf springs might last about miles.


what causes a car to shake

1. Introduction

When your car starts shaking, it can be a cause for concern, as this could be a sign of something serious that needs to be addressed right away. In this article, we will discuss what causes cars to shake and the potential solutions for each issue.

2. What is Engine Misfire?

An engine misfire is when the engine does not fire all of its cylinders in the correct order, resulting in an uneven power delivery and vibration throughout the car. This can cause a shaking sensation while driving or idling and can occur due to a variety of reasons.

3. What Causes an Engine Misfire?

Engine misfires can be caused by faulty spark plugs or wires, worn out distributor caps or rotors, bad fuel injectors, or even low compression in one or more cylinders. It’s important to have these components checked out by a mechanic if you suspect that your car is experiencing an engine misfire.

4. Faulty Ignition System

A faulty ignition system can also cause your car to shake while driving or idling. This includes issues with spark plugs, wires, distributor caps or rotors, and ignition coils that are not functioning properly due to wear and tear over time or other issues such as water damage. If you suspect that one of these components may be causing your car to shake, it’s best to have them inspected by a professional mechanic as soon as possible.

5. Worn or Broken Motor Mounts

Motor mounts are responsible for keeping the engine in place while driving and absorbing any vibration from the engine itself so it doesn’t transfer into the cabin of the vehicle. If these motor mounts become worn down over time they may no longer be able to do their job correctly and will cause your car to shake while driving or idling due to increased vibrations from the engine itself.

6. Out of Balance Tires and Wheels

Tires and wheels that are out of balance can also cause your car to shake while driving as well as at higher speeds on highways and freeways due to increased vibrations from an unbalanced wheel assembly travelling at high speeds over uneven surfaces such as potholes or bumps in the road surface.It’s important to have all four tires balanced regularly in order to avoid any issues related to shaking from unbalanced tires and wheels.

7.Loose or Damaged Suspension Components
Loose suspension components such as control arms,sway bars,shocks,struts,ball joints,bushings,etc., can also cause your car to shake while driving as they are responsible for keeping all four corners of the vehicle firmly planted on the ground during acceleration,cornering,braking,etc.It’s important that all suspension components are checked regularly for wear & tear so any issues with them can be addressed before they start causing any problems with vehicle stability.

8.Faulty Steering System Components
Faulty steering system components such as power steering pumps,tie rods,rack & pinion units,etc., can also cause your car to shake while driving if they become loose over time due their rubber seals wearing down & allowing too much play between them & their respective parts.If you suspect that one of these components may be causing your car’s shaking issue then it should be inspected & serviced by a professional mechanic immediately.

9.Conclusion
Shaking cars can be caused by a variety of different issues including engine misfires,faulty ignition systems,worn motor mounts,unbalanced tires & wheels,loose suspension components & faulty steering system components.It’s important that all these parts are checked regularly by a professional mechanic in order for them not only remain safe but also reliable when travelling on roads & highways alike.

Uncovering the Unsettling Reasons Behind a Shaky Car Ride

Is it OK to drive a car while shaking?

If you notice a constant rattling noise in your car its best to fix the problem before driving. A vehicle that continues to vibrate can cause further damage to the tire components and more expensive problems can be avoided by seeing your mechanic right away.

How do you fix a shaking car?

Tires should be balanced if vibration is felt at certain speeds. If the tires are worn unevenly and the car may vibrate the driver may need to replace the tires. In some cases drivers need new tires to address vibration issues.

Why is my car shaking when sitting still?

A common cause of rough running can be a loose motor mount. Engine mounts are the connection between your engine and your car. They mount your engine securely while reducing the vibrations your engine produces. You are more likely to feel tremors when these connections are lost.

Can transmission cause car to shake?

Low ATF can lead to sluggishness. If the vibration is accompanied by a check engine light its time to see a mechanic.

Does my car shaking mean I need an alignment?

Steering wheel vibration is a common sign of alignment problems There are other signs of these vehicle problems: Continuous vibration: Alignment problems cause the vehicle to vibrate continuously when braking accelerating or maintaining a steady speed.

Does alignment fix shaking?

In most cases wheel alignment will prevent wobbling by ensuring that all wheels are aligned in the same direction. The quickest way to determine safety is to check the tire tread. Unbalanced vehicles often wear tires unevenly and the inner tread wears more than the outer tread.

what causes the ac system to leak

1. Introduction

Air conditioning systems are complex machines that require regular maintenance and repairs to keep them running efficiently and safely. One of the most common problems is leaks in the system, which can lead to costly repairs if not addressed promptly. In this article, we’ll discuss what causes the ac system to leak, as well as common signs of a leak, how to detect a leak, DIY fixes for an AC system leak, professional repair options for an AC system leak, prevention tips for avoiding AC system leaks, and frequently asked questions.

2. Causes of AC System Leaks

The most common cause of an air conditioning system leak is a crack or hole in the condenser coil or evaporator coil. This can be caused by age and wear-and-tear on the coils over time, as well as damage from debris or other objects hitting the coils. Other possible causes include loose fittings or connections that allow refrigerant to escape from the system, a faulty pressure switch or compressor valve that allows refrigerant to escape from the compressor, or a damaged drain pan that allows water to escape from the condensate drain line.

3. Common Signs of a Leak in an AC System

If your air conditioning system is leaking, there are several signs you may notice: higher than usual energy bills due to inefficient operation; strange noises coming from your unit; warm air blowing out of vents; visible water stains on walls near your unit; and a musty smell coming from your vents. If you notice any of these signs, it’s important to have your unit inspected by a professional immediately in order to prevent further damage and costly repairs down the road.

4. How to Detect an AC System Leak

In order to detect an AC system leak properly and accurately, it’s best to have a professional inspect your unit with specialized equipment such as electronic leak detectors or dye injection kits. These tools will help identify where exactly the refrigerant is leaking from so that it can be repaired quickly and efficiently with minimal disruption.

5. DIY Fix for an AC System Leak

For those who feel comfortable tackling their own repairs at home, there are some simple steps you can take in order to fix an AC system leak yourself without having to call in a professional HVAC technician: first make sure all connections are tight; check for any visible cracks or holes in coils; replace any worn out parts; clean debris away from coils; check pressure switch and compressor valve for proper operation; and lastly check condensate drain pan for damage or clogging issues. While these steps may not always solve all issues related to air conditioning leaks, they can often help identify minor problems before they become major ones requiring more extensive repairs down the line.

6. Professional Repair for an AC System Leak

If DIY fixes do not solve your air conditioning problem then it’s time to call in a professional HVAC technician who can properly diagnose and repair any issues related to your air conditioner’s leaks using specialized tools such as electronic leak detectors or dye injection kits mentioned earlier in this article. The technician will also be able to perform any necessary maintenance on your unit such as cleaning coils or replacing worn parts in order ensure optimal operation going forward so you don’t have future problems with leaking again down the road.

7 Prevention Tips for Avoiding AC System Leaks

There are several preventive measures you can take in order avoid future ac system leaks: regularly inspect all connections on your unit for tightness; keep debris away from coils (especially during fall when leaves start falling); check pressure switch/compressor valve regularly for proper operation; replace worn out parts when necessary (such as filters); clean condensate drain pan periodically (or have it professionally cleaned); and lastly schedule regular maintenance visits with a qualified HVAC technician who can identify potential problems before they become major issues requiring expensive repairs down the line.

8 Conclusion

.
Leaks in air conditioning systems can be costly if not addressed promptly but thankfully there are several preventive measures one can take such as regularly inspecting all connections on their units, keeping debris away from coils during fall season,checking pressure switch/compressor valve regularly,replacing worn out parts when necessary,cleaning condensate drain pans periodically,scheduling regular maintenance visits with qualified HVAC technicians who can identify potential problems before they become major issues requiring expensive repairs.With these tips one should be able minimize chances of future ac system leaks.

9 FAQs

.
Q: What causes my ac system to leak? A: The most common cause of an air conditioning system leak is a crack or hole in either the condenser coil or evaporator coil due age/wear-and-tear over time,damage caused by debris hitting coils,loose fittings/connections allowing refrigerant escape,faulty pressure switch/compressor valve allowing refrigerant escape,damaged drain pan allowing water escape through condensate drain line.

Q: What are some signs I may have an ac system leakage? A: Some signs you may notice include higher than usual energy bills due inefficient operation ; strange noises coming from unit ; warm air blowing out vents ; visible water stains on walls near unit ; musty smell coming from vents.

Uncovering the Causes of Leaky AC Systems: How to Stop the Drips and Keep Your Home Comfortable.

Where do AC systems usually leak?

Common locations for refrigerants in home air conditioning systems include: The evaporator coil. Condensing coil. Suction line dryer.

Can I still run my AC if it’s leaking?

As soon as you notice that your air conditioner is leaking go ahead and turn it off. This is important if the air in your home does not feel isolated as it will stop the water from leaking. The more water your air conditioner leaks the more likely it is to be damaged.

How much does it cost to fix a AC leak?

It can cost $160-$375 or more. However if the defect has been present for some time the bill may exceed $550. In such cases replace the AC units that are damaged due to running into extreme cold. Tubes or storage tubes may be added to your bill. September 19 2020

Are AC leaks worth repairing?

If the AC is less than 10 years old the leak usually needs to be repaired. After this system you should have a very good life.

What 3 methods can be used to find a leak in the AC system?

Freeze detection methods include but are not limited to: soap bubble method fluorescent dye method or. Electronic leak detection system.

Does insurance cover a leaking AC unit?

Your landlords insurance may cover leaks in your air conditioning system that cause water damage. Homeowners insurance usually does not cover the cause of the water leak but it covers damage caused by the water leak. For example if water damage is caused by a broken pipe the damage is usually covered but replacement of the pipe is not.

how to use a hair dryer to remove a dent

1. Introduction

Dents can be an eyesore on a car, and they can also reduce its overall value. Fortunately, there is a way to remove dents without the need for expensive repair services. Using a hair dryer is an effective and affordable way to remove dents from your car. In this article, we will discuss how to use a hair dryer to remove a dent, safety precautions to consider before using a hair dryer, step-by-step instructions for using a hair dryer to remove a dent, tips for improving the effectiveness of using a hair dryer to remove a dent, alternatives to using a hair dryer to remove dents, and FAQs about removing dents with a hair dryer.

2. What is a Dent?

A dent is an indentation in the surface of an object that can be caused by impact or pressure. Dents are most commonly found on cars or other vehicles due to minor accidents or hail damage. Dents can also occur on other objects such as refrigerators and washing machines due to excessive pressure or weight being applied on them.

3. How Does a Hair Dryer Help Remove a Dent?

A hair dryer is an effective tool for removing dents because it produces hot air which helps soften the metal in the area of the dent. The heat from the hair dryer causes the metal in the area of the dent to expand which helps push out any air pockets that may have been created by the impact causing the dent. The heat also helps create suction which helps pull out any remaining air pockets from within the metal and eventually removes the dent completely.

4. Safety Precautions to Consider Before Using a Hair Dryer to Remove A Dent

Before attempting to use a hair dryer for removing dents it is important that you take certain safety precautions into consideration:
• Make sure that you are wearing protective gloves when handling hot objects such as the hairdryer or any other tools needed for this task
• Make sure that you are working in well-ventilated areas as some fumes may be released while using hot air tools
• Make sure that you are not standing too close when using hot air tools as these tools may cause burns if used too close
• Make sure that you are not pointing hot air at any flammable materials such as gasoline or paint thinner as these materials may catch fire if exposed too much heat

5. Step-by-Step Instructions for Using A Hair Dryer To Remove A Dent

1) Start by cleaning off any dirt or debris from around the area of the dent so that it is easier to access and work with
2) Set your hairdryer on its highest setting and point it directly at the center of the dent
3) Move your hairdryer around in circles while keeping it pointed at one spot until you start seeing results
4) After you have achieved desired results move onto another spot until all areas of your car with dents have been treated

6. Tips For Improving The Effectiveness Of Using A Hair Dryer To Remove A Dent

1) Use high quality hairdryers with variable settings so that you can adjust temperature accordingly
2) Use higher temperatures when working with thicker metals such as aluminum which will require more heat than thinner metals such as steel
3) Move your hairdryers slowly around in circles instead of quickly moving them back and forth over one spot

7 Alternatives To Using A Hair Dryer To Remove Dents

1) Plunger: This method involves placing suction cups overtop of each side of the dent and then pulling outward while applying pressure downwards simultaneously 2) Boiling Water: This method involves pouring boiling water overtop of each side of the dent until it starts popping outwards

3) Hammer & Block: This method involves placing blocks behind each side ofthe dent and then hammering gently against each block until desired results are achieved

8 Conclusion

Using a hair dryer is an effective way to remove minor dents from cars without spending money on costly repairs services. It requires patience but with proper technique and safety precautions taken into consideration, anyone can successfully use their own household items such as hairdryers for removing small dings from their cars! It’s important however, that if larger more significant damage has occurred then professional help should be sought immediately!

9 FAQs

Q: Is it safe to use my hairdryers on my car’s body?
A: Yes, it is safe provided that all safety precautions are taken into consideration such as wearing protective gloves when handling hot objects and working in well ventilated areas away from flammable materials like gasoline or paint thinner.

Say Goodbye to Dents with a Hair Dryer: Learn How to Use Heat to Restore Your Belongings!

Can you remove a dent with a hair dryer?

There are actually two ways you can use a hair dryer to remove dents from your car. One uses compressed air with heat generated from a hair dryer and the other uses dry ice.

How do you pop out dents yourself?

First heat the 6-inch hole with a hair dryer for about 30 seconds. Then cover the space with aluminum foil and sprinkle dry ice on it. A quick change from hot to cold should expose the teeth in minutes.

Does pouring hot water on a dent fix it?

Yes it helps to remove scratches from metal and plastic bumpers. Fill the pot with water and boil it. Carefully pour water over the surface of the saw to heat the metal. Allow the metal to bend and return to its original shape.

Will heat pop out a dent?

Youll need a hair dryer or heat gun and a can of compressed air (such as used to vacuum computers) to get the job done. Use a dryer or heat gun to heat the dent and place a few inches around the dent area. Keep the heat source moving to avoid damaging the paint.

Does hot water and plunger remove dents?

Hot Water and Piston Method This method can only work on teeth of a certain size. In addition the possibility of increasing damage with this method is very high. Hot water softens the car material so you can apply more pressure to the drill.

Can you pull out a small dent with a plunger?

If the teeth are not too large they can be easily removed with a vacuum cleaner. All you have to do is pour water over your teeth with a hose. Start pressing the strap up and down. Repeat this several times until the tooth comes out.

what are the risks of switching to synthetic oil in older cars

1. Introduction

Synthetic oil has become increasingly popular in recent years, with many drivers opting to switch from conventional oil to synthetic in order to increase the performance and longevity of their vehicles. While synthetic oil has many benefits, there are also potential risks associated with switching to synthetic oil in older cars. This article will discuss the risks of switching to synthetic oil in older cars, as well as the advantages and disadvantages of doing so.

2. What is Synthetic Oil?

Synthetic oil is a type of motor oil that is artificially created from chemical compounds rather than being derived from crude oil like conventional motor oils. Synthetic oils are designed to provide superior protection for engines and are often recommended for high-performance vehicles or vehicles that are driven frequently or under extreme conditions. Synthetic oils typically have higher viscosity levels than conventional motor oils, which means they can better withstand extreme temperatures and provide better lubrication for an engine’s moving parts.

3. Advantages of Synthetic Oil in Older Cars

The primary advantage of using synthetic oil in older cars is that it can help extend the life of the engine by providing superior protection against wear and tear due to its higher viscosity levels. Additionally, synthetic oils tend to last longer than conventional motor oils and require fewer changes, which can save money over time. Synthetic oils also tend to perform better at lower temperatures than conventional motor oils, making them ideal for cold weather climates where temperatures drop below freezing during winter months.

4. Risks of Using Synthetic Oil in Older Cars

While there are several advantages associated with using synthetic oil in older cars, there are also potential risks associated with switching from conventional motor oil to synthetic oil in older cars. One risk is that some older engines may not be able to handle the higher viscosity levels provided by synthetic oils due to age or design flaws, which could cause damage or reduce performance over time if used incorrectly or without proper maintenance. Additionally, some older engines may not be compatible with certain types of synthetics due to compatibility issues between different types of synthetics and conventional motor oils; this could result in premature engine failure if used incorrectly or without proper maintenance.

5. Comparing the Cost of Synthetic Oil to Conventional Oil

When considering whether or not switching from conventional motor oil to synthetic is worth it, it’s important to factor in cost savings over time when comparing the two options. While synthetic oils tend to cost more up front than conventional motor oils, they typically last longer and require fewer changes over time – meaning you’ll save money on labor costs associated with frequent changes as well as on purchasing new bottles of motor oil every few months or years depending on your vehicle’s needs and driving habits.Additionally, many manufacturers offer extended warranties on vehicles equipped with synthetics – meaning you could save even more money if something were to go wrong down the road due to a defect covered under warranty.

6. The Impact of Switching To Synthetic Oil on Your Engine

Switching from conventional motor oil to a full-synthetic blend can have a positive impact on your engine’s performance over time since full-synthetics provide superior protection against wear and tear due its higher viscosity levels compared with traditional petroleum-based products.Additionally,full-synthetics tend to be more resistant against oxidation,meaning they won’t break down as quickly as traditional petroleum-based products – resulting in less build up inside your engine over time.Furthermore,some full-synthetics contain additives that can help reduce friction between moving parts,resulting in improved fuel economy.

7.Potential Issues With Using Synthetic Oils In Older Vehicles

Though there are several potential benefits associated with switching from conventional motor oil to a full-synthetic blend,there are also potential issues that may arise when using synthetics in older vehicles.For example,some engines may not be able to handle the higher viscosity levels provided by full-synthetics due age or design flaws,resulting decreased performance over time if used incorrectly or without proper maintenance.Additionally,compatibility issues between different types of synthetics and traditional petroleum – based products could result premature engine failure if used incorrectly or without proper maintenance.It’s important consider these potential issues before making switch from traditional petroleum – based products full – synthetics.

8.Conclusion

In conclusion,there are both advantages and risks associated with switching from traditional petroleum – based products full – synthetics when it comes maintaining an older vehicle’s engine.Some advantages include improved performance,increased fuel economy,extended life expectancy,cost savings over time due fewer required changes ; however,it’s important consider potential compatibility issues between different types of synthetics traditional petroleum – based products before making switch as well potential decreased performance due age – related design flaws before making any decisions regarding which type of product use maintain your vehicle’s engine health.

9.Sources

1 ) “What Is Synthetic Motor Oil ? ” Mobil Motor Oils Official Website ; https : / / www.mobiloil.com / en / usa / product – services / car – care / what – is – synthetic – motor – oi l ( Accessed April 28th 2021 )
2 ) “Synthetice vs Conventional Motor Oil : What ‘ s The Difference ? ” Valvoline Official Website ; https : //www.valvoline.com/motor-oil/conventional-vs-synthetic (Accessed April 28th 2021)
3 ) “Advantages & Disadvantages Of Full Synthetic Motor Oils” Castrol Official Website ; https://www3castrolcom/en_gb/united kingdom/car/advice/full-syntheticoil (Accessed April 28th 2021)

The Hidden Dangers of Synthetic Oil: How Switching Could Put Your Older Car at Risk

Is it OK to put synthetic oil in an old car?

Modern synthetic oils are safe to use in all types of vehicles from newly purchased vehicles to classic vehicles to aging non-classic vehicles. The notion that synthetic oils are bad for older engines probably arose before synthetic oils were widely tested.

Can switching to synthetic oil cause problems?

So switching your vehicle from mineral oil to synthetic oil (and vice versa) usually aims to damage your engine.

Is there a downside to using synthetic oil?

Some disadvantages of synthetic oil should be aware of: Perhaps the most obvious disadvantage of synthetic oil is cost. Synthetic oil is two to four times more expensive than conventional oil. Synthetic materials may be more susceptible to additive precipitation under refrigerated conditions.

Is it okay to switch from high mileage oil to synthetic?

You can change your regular motor oil to Mobil 1™ synthetic oil (and vice versa if you wish) without any special procedures. There are two exceptions to this: high mileage engines that have never used synthetic motor oil or engines that use regular motor oil and have not had a service failure.

What type of oil is best for older cars?

Newer engines are designed to use this light lubricant internally and improved sealing techniques prevent leaks but we generally think older engines are better suited to the heavier synthetic oil 10W-30 or 20W-50. July 27 2015

What happens if you put non synthetic oil in a car that needs synthetic oil?

So what if you ignore the recommendations in the owners manual and switch to conventional oil? Calkins said the engine wasnt going to explode or anything. But you will see that the deposits will grow and grow. And again its okay to supplement with conventional oils in a pinch.

symptoms of a bad or failing engine control module ecm

1. Introduction

The engine control module (ECM) is an important component of a vehicle’s engine, as it controls and monitors the performance of the engine. It is responsible for controlling various aspects of the engine, such as fuel injection, ignition timing, and other functions. When the ECM malfunctions, it can cause a variety of symptoms that can affect the performance of the vehicle. In this article, we will be discussing some of the common symptoms of a bad or failing ECM.

2. What is an ECM?

The engine control module (ECM) is an electronic component in a vehicle’s engine that controls and monitors various aspects of the engine’s performance. It is responsible for controlling fuel injection, ignition timing, air/fuel ratio, and other functions necessary for optimal engine performance. The ECM receives input from various sensors located throughout the vehicle to adjust these settings accordingly.

3. Common Symptoms of a Bad or Failing ECM

When an ECM begins to malfunction or fails completely, it can cause a variety of symptoms that can affect the performance of your vehicle. Some common symptoms include:

4. Check Engine Light Illuminated

One of the most common symptoms associated with a bad or failing ECM is an illuminated check engine light on your dashboard. This can indicate that there is something wrong with your vehicle’s electrical system or emissions system and should be addressed immediately by having it inspected by a qualified technician or mechanic.

5. Engine Performance Issues

Another symptom associated with a bad or failing ECM is poor overall engine performance or abnormal behavior from your vehicle’s motor such as stalling, misfiring, hesitating when accelerating, or decreased power output when accelerating from a stop position. If you notice any issues with your vehicles motor such as these it may be worth having it inspected for potential problems with its ECM.

6 Poor Fuel Economy

A malfunctioning ECM may also cause poor fuel economy due to incorrect air/fuel ratio settings which results in more fuel being used than necessary to power your vehicle’s motor properly resulting in decreased fuel efficiency over time if left unchecked and unaddressed by a qualified technician or mechanic

7 Difficulty Starting the Vehicle

If you have difficulty starting your car after attempting to start it several times then this could be another symptom associated with a bad or failing ECM as well as other potential issues like low battery voltage due to age related wear & tear on components within its electrical system

8 Unusual Noises from the Engine Compartment

If you hear any unusual noises coming from under your hood such as knocking sounds then this could also indicate potential problems with your vehicles ECM and should be addressed by having it inspected by a qualified technician or mechanic

9 Conclusion

> In conclusion,if you are experiencing any issues with your vehicles performance such as illuminated check engine lights,poor fuel economy,difficulty starting,misfiring,stalling,hesitation when accelerating,decreased power output when accelerating from stop positions,or any other unusual noises coming from under your hood then these could all be symptoms associated with a bad or failing Engine Control Module (ECM). It is important that you have these issues addressed immediately by having them inspected by qualified technicians & mechanics so they can diagnose & repair any potential problems before further damage occurs.

Warning Signs of a Malfunctioning Engine Control Module (ECM): What to Look Out For!

What is the most common failure of an ECM?

The wiring harness is one of the most common causes of ECM failure. Corroded transmission or fuel injector wires can lead to loss of conductivity and failure. Fortunately these problems can usually be solved by replacing the vertical rod.

What happens when the ECM goes bad?

A faulty ECM can send incorrect data to the vehicles transmission control module (TCM). As a result the vehicle is unable to shift gears or deliver power properly resulting in difficult delayed or even erratic shifts. When this happens the engine may occasionally start or stall.

How are ECM problems diagnosed?

A minimally invasive way to diagnose the ECM is to plug a diagnostic tool (OBD or OBD II) into the diagnostic port. Here you can scan your systems computer hardware to see if any error codes are generated. There are many such codes and diagnostic tool documentation should contain information about their meaning.

Can AutoZone test my ECM?

AutoZone Loan-A-Tool Oil Recycling System Battery Tester ECM Tester Battery Tester and Engine Light Fix Finder all free. After receiving the test results you can decide whether to replace the battery or have the vehicle serviced.

What are the signs of a defective engine ECU?

Primary signs of ECU failure: The Check Engine Light (MIL light) in the instrument cluster illuminates The car goes into emergency mode The car vibrates or the engine fails to start on all cylinders are notable examples. All of these could indicate a malfunction in the engine control unit.

Can I replace an ECM myself?

Q&A Is ECM replacement difficult? is not! The parts arent cheap (unless you buy them from us) and the high quality OEM ECMs are easy to install yourself.

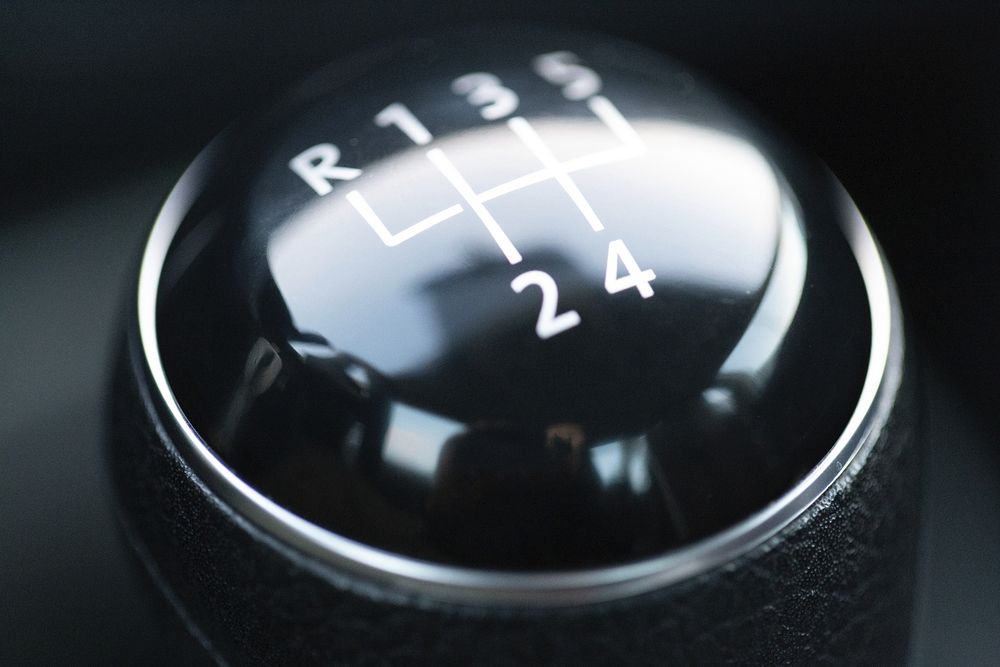
the meanings of automatic gear shift letters numbers

1. Introduction

An automatic gear shift is an important part of any vehicle, allowing drivers to switch between gears quickly and easily. Understanding the meanings of the letters and numbers associated with an automatic gear shift can help you make the most of your car’s performance. In this article, we’ll explain what an automatic gear shift is, how it works, and the meanings behind the letters and numbers associated with it. We’ll also discuss some of the advantages and disadvantages of using an automatic gear shift.

2. What is an Automatic Gear Shift?

An automatic gear shift is a type of transmission that allows a vehicle to automatically switch between gears as needed in order to optimize performance. It consists of a series of gears that are connected to a lever that can be moved up or down in order to select which gear should be engaged at any given time. The lever typically has letters or numbers printed on it that indicate which gear is currently selected.

3. How Does an Automatic Gear Shift Work?

An automatic gear shift works by using sensors that detect when more power is needed from the engine in order to accelerate or maintain speed on hills or inclines. When this happens, the transmission shifts into a higher gear, allowing for increased torque and power output from the engine while still maintaining fuel economy. When less power is needed, such as when coasting downhill or slowing down, the transmission will automatically switch back into a lower gear in order to conserve fuel and reduce wear on components like brakes and tires.

4. The Meaning of the Letters and Numbers on an Automatic Gear Shift

The letters and numbers associated with an automatic transmission are typically used to indicate which gear is currently selected by the driver or by the vehicle itself depending on driving conditions. Generally speaking, lower numbers indicate lower gears while higher numbers indicate higher gears – for example “P” stands for Park while “D” stands for Drive (the highest available forward gear). Other common letter/number combinations include “R” for Reverse, “N” for Neutral, “1” for First Gear (lowest available forward gear) and so on up through higher numbers representing higher gears such as 4th, 5th or 6th depending on how many gears are available in your particular model of car or truck.

5. Common Letter/Number Combinations on Automatic Gear Shifts

The most common letter/number combinations found on automatic transmissions are: P – Park; R – Reverse; N – Neutral; D – Drive; 1 – First Gear; 2 – Second Gear; 3 – Third Gear; 4 – Fourth Gear; 5 – Fifth Gear; 6 – Sixth Gear (if applicable). Depending on your vehicle’s make/model/year there may be different combinations available as well as additional features such as manual shifting capability (i.e., M1-M6).

6. Advantages of Using an Automatic Gear Shift

Using an automatic transmission has several advantages over manual transmissions including improved fuel economy due to smoother shifts between gears as well as reduced wear-and-tear since there is no need to manually change gears during normal operation (except when manually shifting). Additionally, many modern vehicles come equipped with features such as adaptive cruise control which can automatically adjust speed based on traffic conditions without requiring any input from the driver other than setting their desired speed range beforehand – making long trips more comfortable while also reducing fatigue from constantly having to manually adjust speed settings if using a manual transmission instead.

7. Disadvantages of Using an Automatic Gear Shift

One disadvantage of using an automatic transmission is that they tend to be less efficient than manual transmissions due to their reliance on sensors rather than direct input from a driver who can better anticipate changes in terrain or traffic conditions ahead of time – resulting in slower response times when switching between gears compared with manual transmissions where drivers can pre-emptively switch into lower/higher gears before reaching inclines/declines respectively.Additionally, some drivers may find them less enjoyable due to lack of control over shifting compared with manual transmissions where they can choose exactly when they want to change gears based off personal preference rather than relying solely upon sensors within their vehicle’s transmission system.

8 Conclusion

In conclusion,understanding what each letter/number combination means on your vehicle’s automatic transmission can help you make more informed decisions about how you drive your car,ultimately helping you get better performance out of it while also reducing wear-and-tear over time.Automatics offer several advantages over manuals,including improved fuel economy,reduced fatigue during long trips,and potentially faster response times when switching between gears depending upon driving conditions.However,they also have some drawbacks such as potentially slower response times compared with manuals due to reliance upon sensors rather than direct input from drivers.

9 FAQs

Q: What does P mean on my car’s automatic transmission?
A: P stands for Park – indicating that your car’s transmission has been set into its lowest possible forward gear ratio allowing it remain stationary regardless if its engine is running or not.
Q: What does D mean?
A: D stands for Drive – indicating that your car’s highest available forward gearing ratio has been selected allowing it move freely under normal driving conditions.

Uncovering the Hidden Significance Behind Automatic Gear Shift Letters and Numbers

What do the numbers on an automatic shifter mean?

The numbers on an automatic transmission indicate the gear ratio. The higher the number the higher the gear ratio. The lower the number the lower the gear ratio. For example entering first gear and shifting to second gear makes the car go faster.

What does the letters on the gear shift mean?

You may have noticed that most vehicles have the letters P R N S and L on the shift control. These all represent different conditions of your transmission and correspond to different modes of operation. P is for park. R stands for reverse. N stands for neutral. D is for cars.

What does D D1 D2 D3 mean in automatic?

In other words each has a maximum speed that can be safely used perhaps like this: D1–20mph (30kph) D2–35mph (50kph) D3–50mph (70kph) D4–all 50mph (70kph) .

What does D1 D2 D3 D4 mean in automatic cars?

What is D1 D2 and D3 in automatic transmission cars? Drive 1 Drive 2 and Drive 3. Basically low gear for automatic transmission. Usually you drive normally (o/d).

What is D+ and D in automatic cars?

Plus is useful when you see a suddenly illuminated road and want to accelerate quickly from the current gear by operating the accelerator and gear as if you were driving a car. Push is when you intend to get off and move fast getting to the Push mark. Its like manual override for an automatic transmission.

What is H and L gear?

Multiple shifters are often numbered or marked in some way such as H for high gear and L for low gear. 1 or L stands for inner blade (closer to bike). This chain has low drag and is useful on very steep slopes and flat terrain.

is it safe to drive with the tpms light on

1. Introduction

Tire Pressure Monitoring Systems, or TPMS, are designed to help drivers monitor the air pressure in their tires and alert them when it is too low. But what happens if the TPMS light comes on? Is it safe to drive with a malfunctioning TPMS light on? This article will answer that question by exploring what TPMS is, how it works, the benefits of having a TPMS system installed, when you should replace your TPMS sensors, and the dangers of driving with a malfunctioning TPMS light on.

2. What Is TPMS?

TPMS stands for Tire Pressure Monitoring System. It is an electronic system that continuously monitors the air pressure in your tires and alerts you if it falls below a certain threshold. The purpose of this system is to ensure that your tires are properly inflated at all times, as this helps improve fuel efficiency and safety while driving.

3. How Does TPMS Work?

TPMS works by using sensors that are mounted inside the tire itself or mounted externally on the wheel rim. These sensors measure the air pressure inside each tire and transmit this data wirelessly to a receiver that is located inside the vehicle’s dashboard display. If any of the tires fall below a certain threshold, an alert will be triggered and displayed on the dashboard display so that you can take action to correct it before any damage occurs.

4. What Are the Benefits of TPMS?

The primary benefit of having a Tire Pressure Monitoring System installed in your vehicle is improved safety while driving. Properly inflated tires provide better handling, braking performance, and fuel efficiency than under-inflated tires do. Additionally, they also reduce wear-and-tear on your vehicle’s suspension components and reduce tire noise as well as vibration levels inside your car’s cabin. Finally, having a functioning TPMS system can also help you save money in terms of fuel costs since properly inflated tires require less energy to move forward than under-inflated ones do.

5. When Should You Replace Your TPMS Sensors?

You should replace your TPMS sensors every 5 years or whenever they become damaged or worn out from normal use due to age or exposure to extreme temperatures or conditions such as mud or saltwater splashes from puddles etc.. Additionally, you should also check your tire pressure regularly even if your Tire Pressure Monitoring System does not detect any issues because sometimes these systems can fail due to technical problems or interference from other electronic devices within close proximity such as cell phones etc..

6. What Are the Dangers of Driving With a Malfunctioning TPMS Light On?

Driving with a malfunctioning Tire Pressure Monitoring System can be dangerous because you may not be aware if one of your tires is significantly under-inflated until it causes damage such as blowouts or tread separation which could lead to serious accidents due to lack of control over your vehicle’s steering capabilities etc.. Additionally, driving with an under-inflated tire can lead to decreased fuel efficiency which can cost you money in terms of wasted fuel costs over time due to increased rolling resistance caused by lower air pressure levels inside each tire..

7. Can You Drive With a Malfunctioning TPMS Light On?

Yes, you can drive with a malfunctioning Tire Pressure Monitoring System light on but only for short distances until you get it fixed because doing so for extended periods of time could cause further damage due to lack of awareness about potential issues caused by under-inflated tires such as blowouts etc.. Additionally, make sure that all four tires are properly inflated before attempting any long drives since this will help ensure maximum control over your vehicle’s steering capabilities at all times while also helping improve overall fuel efficiency levels over time due to reduced rolling resistance caused by higher air pressure levels inside each tire..

8 Summary & Conclusion

In conclusion, it is not recommended that you drive with a malfunctioning Tire Pressure Monitoring System light on for extended periods of time since doing so could lead to serious accidents due to lack of awareness about potential issues caused by under-inflated tires such as blowouts etc.. However, if necessary then make sure all four tires are properly inflated before attempting any long drives since this will help ensure maximum control over your vehicle’s steering capabilities at all times while also helping improve overall fuel efficiency levels over time due to reduced rolling resistance caused by higher air pressure levels inside each tire..

9 References

.

1) https://www3a4a1c45f6e0b7d9f8850bfa7e4fb3c3d4d00c6f7520c1ddf6e8df735cd9a0aa/www/en_us/owner/maintenance/tpms/tpms_basics_and_benefits_of_using_it_.html
2) https://www3a4a1c45f6e0b7d9f8850bfa7e4fb3c3d4d00c6f7520c1ddf6e8df735cd9a0aa/www/en_us/owner/maintenance/tpms/when_should_you_replace_your_tpms_sensors_.html
3) https://www3a4a1c45f6e0b7d9f8850bfa7e4fb3c3d4d00c6f7520c1ddf6e8df735cd9a0aa/www/en_us/owner/maintenance/tpms/_howdoesitwork_.html

TPMS Light On? Find Out How to Drive Safely and Avoid Costly Repairs!

How long can I drive with TPMS light on?

If the tire pressure is low and there is no puncture but the TPMS warning light is still on try warming up the car and drive more than 30 km for at least 10 minutes until the warning light goes off.

Can I drive with the TPMS on?

It is safe to drive with the TPMS light on. This is one of your tires that is not underinflated or underinflated. The specific tire pressure for your vehicle can be found in your owners manual or on a sticker on the door trunk or fuel door.

Why is my TPMS light on but tires are fine?

Doing this with tire pressure can wear or damage the wheel sensor if your tires are out of balance. If the wheel sensor is faulty the TPMS light will come on when the tire pressure is on.

What happens if TPMS light stay on?

When the TPMS warning light comes on and stays on it indicates a low pressure condition in one or more tyres. By inflating the tire to the pressure recommended on the door sign the light should go out.

Is TPMS an emergency?

Follow these tips and stay safe when your TPMS light comes on First of all a tire pressure monitoring system (TPMS) is not a substitute for regular tire maintenance. Although this is a great addition to your emergency warning system that you should take seriously.

What triggers a TPMS sensor?

Your vehicles direct TPMS uses a sensor located in the wheels. It measures the air pressure of each tire. If the pressure drops 25 percent below the recommended air pressure, the TPMS will be triggered and you will see the vehicles warning light on the dashboard.

symptoms of a bad or failing canister purge solenoid

1. Introduction

The canister purge solenoid is an important component of a vehicle’s emissions system. It is responsible for controlling the flow of fuel vapors from the fuel tank to the engine, where they can be burned off safely and efficiently. A malfunctioning or failing canister purge solenoid can cause a number of issues with a vehicle’s emissions system, leading to decreased performance and increased emissions levels. In this article, we will discuss the symptoms, causes, diagnosis, and replacement cost of a bad or failing canister purge solenoid.

2. What is a Canister Purge Solenoid?

The canister purge solenoid is an electronically controlled valve that regulates the flow of fuel vapors from the fuel tank to the engine. The purpose of this valve is to reduce the amount of unburned hydrocarbons in the exhaust gas by burning them off in the combustion chamber instead. The valve is usually located near or on top of the charcoal canister in most vehicles and is powered by vacuum pressure from either an intake manifold vacuum line or an electric vacuum pump.

3. Symptoms of a Bad or Failing Canister Purge Solenoid

When a canister purge solenoid begins to fail, there will be certain symptoms that alert the driver that something is wrong with their vehicle’s emissions system. Some common signs include:
• Check Engine Light: A faulty canister purge solenoid will often trigger a check engine light warning on your dashboard. This indicates that there is an issue with your vehicle’s emissions system that needs to be addressed as soon as possible.
• Poor Fuel Economy: If your car’s fuel economy has suddenly decreased without any other changes being made, it could be due to a bad or failing canister purge solenoid which is not allowing enough fuel vapors to be burned off in the combustion chamber resulting in reduced efficiency and increased fuel consumption.
• Rough Idling: If your car has begun idling roughly even when it has been running smoothly before, it could be due to a faulty canister purge solenoid causing an imbalance in air/fuel ratio which leads to rough idling or stalling at low RPMs.

4. Causes of a Bad or Failing Canister Purge Solenoid

There are several potential causes for a bad or failing canister purge solenoid including:
• Vacuum Leaks: Vacuum leaks are one of the most common causes for faulty canister purge solenoids as they disrupt proper operation and cause imbalances in air/fuel ratios which lead to poor performance and increased emissions levels.
• Clogged Vacuum Lines: Clogged vacuum lines are another common cause for bad or failing canister purge solenoids as they restrict proper operation and prevent proper flow of fuel vapors from entering into the combustion chamber resulting in reduced performance and increased emissions levels.
• Worn Out Components: Over time, components such as O-rings and gaskets may become worn out due to age or wear-and-tear resulting in improper operation and decreased performance levels from your vehicle’s emissions system overall.

5 Diagnosis of a Bad or Failing Canister Purge Solenoid

Diagnosing a bad or failing canister purge solenoid requires professional attention as it involves specialized equipment such as diagnostic scanners and smoke machines which are necessary for properly diagnosing any issues with your vehicle’s emissions system overall. Once diagnosed, repairs should be done immediately as further delays may result in more serious consequences such as increased emissions levels which could lead to fines if left unchecked for too long period of time by local authorities depending on where you live/drive..

6 Replacement Cost of a Bad or Failing Canister Purge Solenoid

Replacing a bad or failing canister purge solenoid typically costs anywhere between $100-$200 depending on make/model/year and location (labor rates vary). Parts costs usually range between $50-$100 depending on make/model/year but keep in mind that additional parts may also need replacing if other components have been affected by wear-and-tear over time such as O-rings, gaskets etc..

7 How to Prevent Damage to the Canister Purge Solenoid

To prevent damage to your car’s emission system components including its Canister Purge Solonid (CPS), you should regularly inspect all hoses connected directly with it for any signs of wear-and-tear such as cracks, holes etc.. Additionally you should also regularly check all electrical connections related directly with CPS for any signs corrosion build up which could potentially interfere with its functionality over time if left unchecked..

8 Conclusion

.
In conclusion, understanding how symptoms arise when dealing with faulty components like CPS helps drivers better identify potential problems before they become serious issues down road so it pays off always paying close attention when driving around town especially during hot summer months when temperatures tend rise significantly..

Warning Signs: Uncovering the Causes of a Failing Canister Purge Solenoid

What happens when a purge solenoid goes bad?

What happens when your bleed valve fails? Damaged box flushometers may stick. This prevents fuel vapors from settling and causing vacuum leaks that can cause engine performance problems.

How do I know if my purge valve is bad?

To test your purge valve set the multimeter dial to ohms place the probes on the power terminals of the purge valve and check the resistance between the terminals. Readings below 14 ohms or above 30 ohms indicate that the drain valve is worn and needs to be replaced.

What happens if you drive with a bad canister purge valve?

A vacuum leak can occur when the canister purge valve is not working properly and cause damage to a vehicles engine. This causes air to enter the engine irregularly causing the cars computer to react. This results in an altered air-to-fuel ratio resulting in erratic idling and difficulty starting.

What happens if EVAP purge valve is stuck closed?

A vent valve closed. This created a vacuum in the fuel tank which distorted it which disturbed the float level causing the fuel gauge to stop and cause a rich fuel condition (more fuel than air in the fuel mixture) which damaged the spark plugs.

How long does a EVAP purge solenoid last?

Normally the purge solenoid box can last the life of the vehicle but it can wear out over time. If the solenoid box starts going out the check engine light will come on and your car will fail the emissions test.

Can a purge solenoid be cleaned?

Cleaning solenoid valves can be done in two ways and the one you choose depends on how technical you are. Our main goal is to remove stains that prevent it from working properly for many people so simply rinsing the internals without opening them up gets the job done.

symptoms of a bad or failing fuel pump

1. Introduction

A fuel pump is a vital part of a car’s engine and is responsible for delivering fuel from the tank to the engine. The fuel pump is usually located in the fuel tank, but can also be located outside the tank or even in the engine bay. If a fuel pump fails or starts to go bad, it can cause serious problems for your car’s engine, such as stalling, poor performance, and even complete failure. In this article, we will discuss the common symptoms of a bad or failing fuel pump, how to diagnose any issues that may arise, and how to prevent damage from occurring in the future.

2. What is a Fuel Pump?

A fuel pump is an electrical device that pumps gasoline from the gas tank to the engine. It is usually located inside the gas tank but can also be found outside of it or even in the engine bay. The fuel pump works by using an electric motor to create pressure within the lines that carry gasoline from the tank to other parts of the vehicle’s system. This pressure forces gasoline through those lines so that it can be used by the engine for combustion purposes.

3. Common Symptoms of a Bad or Failing Fuel Pump

When a fuel pump begins to fail or go bad, there are several symptoms that will become apparent. Some of these symptoms include:
• Engine stalling – If your car’s engine suddenly stalls while driving, this could be caused by a failing fuel pump as it may not be able to deliver enough pressure or volume of gasoline to keep your car running properly.
• Difficulty starting – Another symptom of a failing fuel pump is difficulty starting your vehicle due to insufficient pressure or volume of gasoline being delivered by the pump. This issue can also cause your car’s battery light to come on as well as excessive cranking before starting up again.
• Poor acceleration – A failing fuel pump can also cause poor acceleration due to lack of sufficient pressure or volume being delivered by the pump which will result in insufficient amounts of gasoline reaching your car’s engine for combustion purposes which will lead to poor acceleration performance
• Engine misfiring – A misfiring engine could be caused by a bad or failing fuel pump as it may not be able to provide enough pressure or volume for proper combustion within your car’s cylinders leading them not firing correctly resulting in an uneven running condition

4. Diagnosing a Bad or Failing Fuel Pump

If you suspect that you have an issue with your vehicle’s fuel pump then there are several tests you can conduct yourself at home without needing any special tools other than basic hand tools such as pliers and screwdrivers etc… These tests include:
• Checking for any signs of leakage around where your vehicle’s gas tank connects with its hoses and lines; if you find any signs then this could indicate an issue with either its hoses and lines themselves or with its internal components such as its sealing gasket which could lead to problems with its delivery system
• Listening for any unusual noises coming from around where your vehicle’s gas tank connects with its hoses and lines; if you hear anything out of ordinary then this could indicate an issue with either its hoses and lines themselves or with its internal components such as its sealing gasket which could lead to problems with its delivery system
• Checking for any signs of wear on any electrical components connected directly with your vehicle’s gas tank; if you find anything out-of-the-ordinary then this could indicate an issue with either its electrical wiring itself or with one of its internal components such as its motor which could lead to problems with its delivery system

5. Causes of a Bad or Failing Fuel Pump

There are several causes that can lead to issues regarding your vehicle’s fuel delivery system including:
• Worn out seals – Over time seals around where your vehicle’s gas tank connects with hoses and lines can wear out due age leading them not providing sufficient seal between them resulting in loss-of-pressure within their systems leading them not working correctly
• Electrical faults – Electrical faults within either wiring connected directly into your vehicle’s gas tank itself (such as power supply wires) or within one of its internal components (such as motor) can cause issues regarding their operation leading them not working correctly

6. The Cost Of Replacing A Fuel Pump

The cost associated replacing a failing/bad fuel pump depends upon several factors including make/model/year/engine size etc… Generally speaking however replacing a single unit should cost somewhere between $200-$400 depending upon these variables mentioned above plus labor costs associated installing it into place etc… As always we highly recommend seeking professional advice when considering replacing any parts related directly into vehicles systems such us their engines etc…

7 How To Prevent Damage To The Fuel Pump?

There are several ways you can help prevent damage occurring towards your vehicles’fuel delivery system including: • Regular maintenance checks – By regularly checking all hoses connected directly into your vehicles’gas tanks (as well as their connections) you’ll help ensure they stay sealed correctly thus preventing loss-of-pressure within their systems leading them working correctly • Avoid overfilling – Overfilling gas tanks can put additional strain on both their seals (leading them wearing out faster) plus on their internal components (such us motors) thus reducing their life expectancy • Use quality fuels – Always use quality fuels when refuelling vehicles’gas tanks; lower quality fuels contain more impurities which over time build up inside tanks thus causing blockages leading them reducing efficiency levels • Use good quality additives – Good quality additives help keep both seals and internal components clean thus helping reduce build up inside tanks plus helping ensure they work efficiently at all times

8 Conclusion

Knowing what symptoms indicate potential issues regarding bad/failing pumps helps ensure they’re replaced quickly before further damage occurs towards other parts connected directly into vehicles’fuel delivery systems; knowing what causes these issues helps prevent damage occurring in future too! With proper maintenance checks plus using good quality fuels plus additives helps ensure these pumps work efficiently at all times too!

Warning Signs: Uncover the Telltale Symptoms of a Failing Fuel Pump!

N/A

N/A

N/A

N/A

N/A

N/A

N/A

N/A

N/A

N/A

N/A

N/A

N/A